Welcome to the Oakshott Scandinavia Blog Hop!! I am so glad you stopped by!

Oakshotts are shot cottons and therefore have cream warp and a luscious color weft. Because of this special weave, they are particularly luxurious, and have a rich deep sheen. They also wear like iron, so are worthy of your heirloom makes!
Today's tutorial is for my crib quilt, On The Wings Of Love, a sweet breezy baby quilt to lighten your heart, and your day!
I chose to design a quilt that emphasized the negative space in the quilt, and the luxury of the cream Bergen, while giving the colors of the other wonderful Scandinavian fabrics, place to shine.

I wish you could feel how soft and squishy it is!

When I think of Scandinavian design, I think of bright, light, breezy interiors, and simple curved lines so evocative of Nature and Purity. So I made you this quilt for your little round cheeked bouncing baby. It has everything you need...

Messages of Love to wing your cherub to their dreams,

And luscious soft colors to wrap them in comfort.

The back is pure Scandi in soft grey and soft white,

With a grid to guide their way home from their Nighttime adventures,

Sweet Dreams Little Ones!!
Tutorial
Materials
Fabric:
Oakshott Scandinavia
1 1/2 yard 01 Bergen (vanilla creme)1 yard 08 Stockholm (dark grey)
Fat Eights in:
02 Copenhagen (green)
03 Tromso (pink)
04 Helsinki (grellow)
05 Malmo (blue)
06 Oslo (purple)
07 Uppsala (light grey)
Thread:
Aurifil 2021 (cream) in 50wt for piecing and quilting
Aurifil 2021 (cream) in 50wt for piecing and quilting
Other Materials:
fabric glue stick
card stock
painters tape
Quilting ruler and rotary cutter, pins, iron and ironing surface.
Preparation:
Iron all fabrics
Print and cut out templates. Glue to cardstock, and cut out heavy template.
Place painters tape on the back of templates to provide a non-slip grip surface.

Cutting:
Cut fabric using templates;
A -Cut 2 Helsinki, plus 1 all other colors
B -Cut 8 Bergen
Background;
Cut 10, 7 1/2" squares of Bergen
Corner Stones (4);
Cut 2, 5 3/4" squares of Bergen. Cut in half on the diagonal

Setting Triangles (10);
Cut 3, 111/8" squares of Bergen. Cut into quarters, diagonally. (There will be 2 extra).

Border;
65", Cut 4, 2" strips. Join diagonally.
Assemble Blocks:
Sewing;
3 Pin Method;
1. Fold all block components in half and finger press to mark the center of the block
-press B ws together
-press A rs together

2. Nest centers of A and B together. Pin at center mark.

3. Match beginning of A and B, pin.


4. Set needle to scant 1/4" seam
5. Set stitch length to 3.0 or one setting above your regular stitch
6. Needle down, and pull/hold needle and bobbin threads during your first few stitches so that your block doesn't get sucked down into your machine
 |
| I did not sew over that pin :) |
7. Using your fingers to keep the fabric edge together, pull curve straighter, sew slowly along edge up to center pin, do not remove pin,

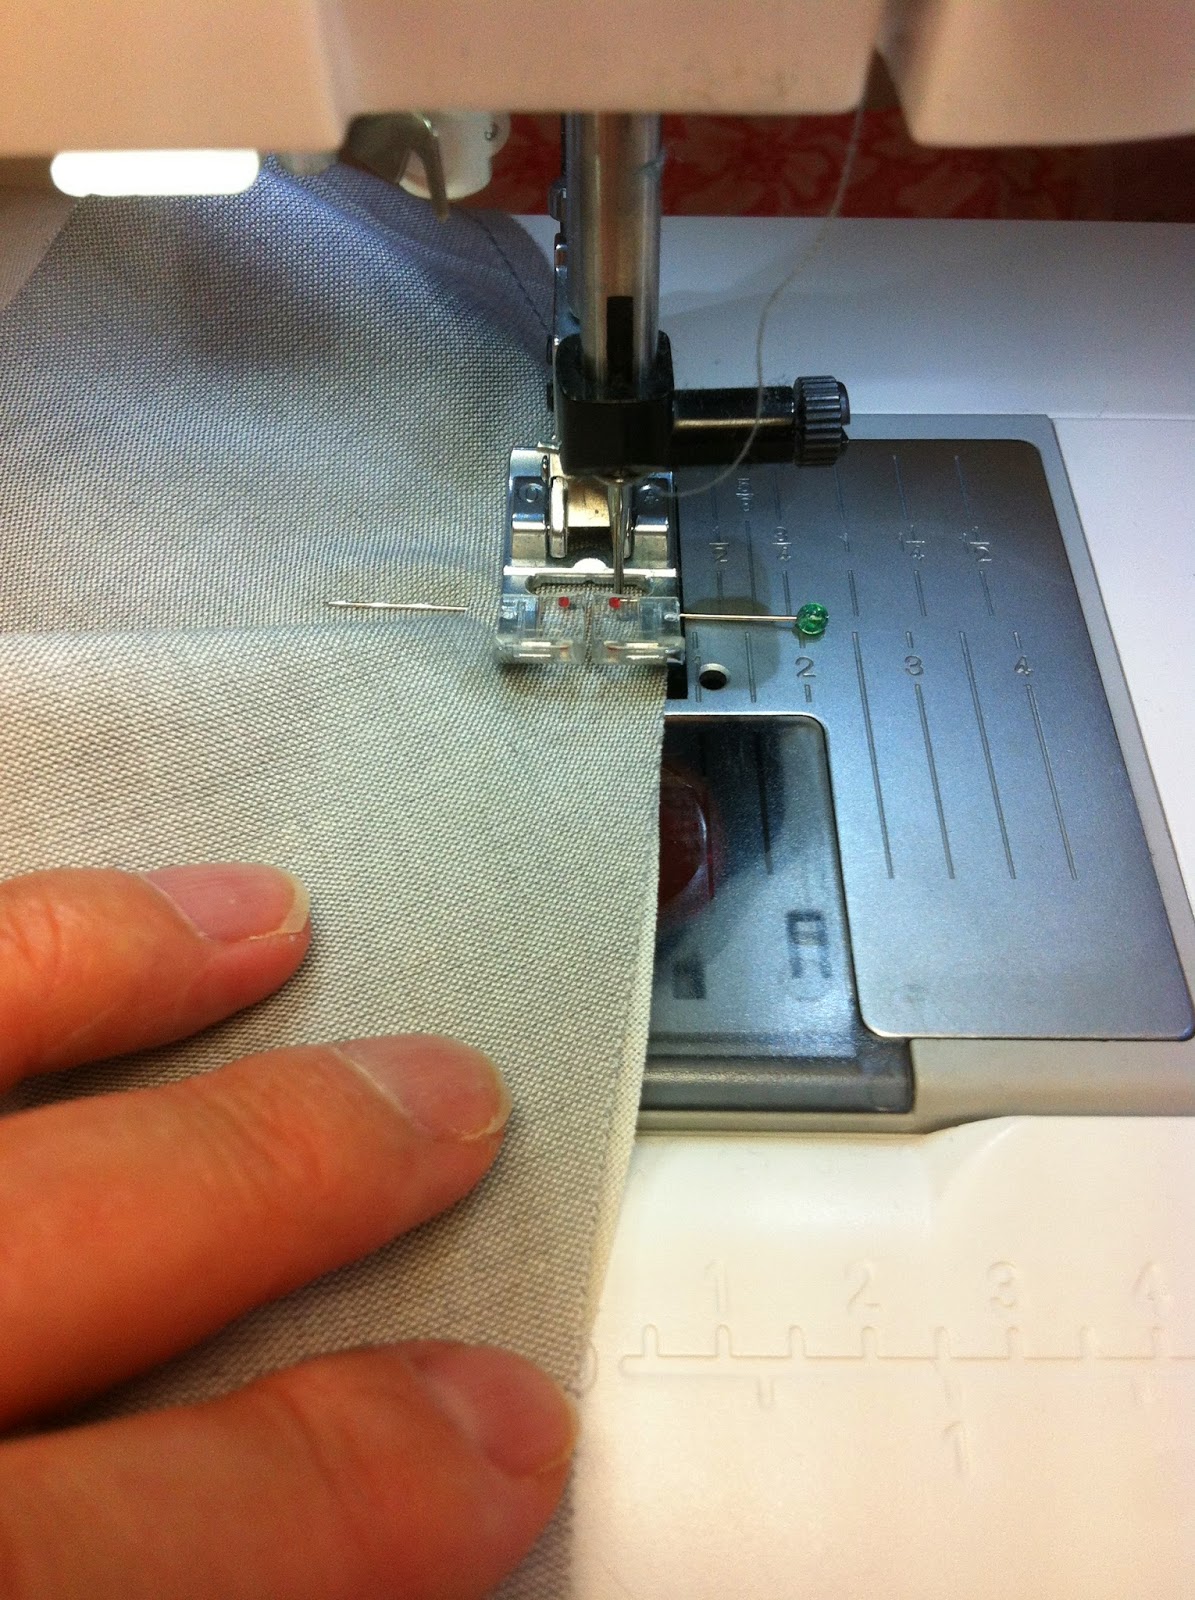
8. Place last pin at end of curve, making sure that the outside edges are even

9. Remove center pin. Sew slowly, fingers keeping fabric edges meeting as you go, pulling gently

Just before the end, pull up on the center of the upper fabric to align edge and keep from getting a tuck in your seam.

Continue sewing to pin, remove pin, sew to end. Wahoo! First curved seams!!
10. Press all seams towards the dark fabric (away from background). Do not swish your iron in an arc!!! Just press straight down in parallel lines,

Place blocks while hot under a heavy book for super flat blocks!
11. Trim blocks to 7 1/2" x 7 1/2"
Assemble Quilt:
See Layout chart for guidance on block placement
1. Layout your blocks in your desired order

2. Pin in diagonal rows

3. Sew rows. Add cornerstones to each corner. Sew

4. Press seams in each row in opposite directions from each other
5. Nest seams of first two rows, pin. Sew.

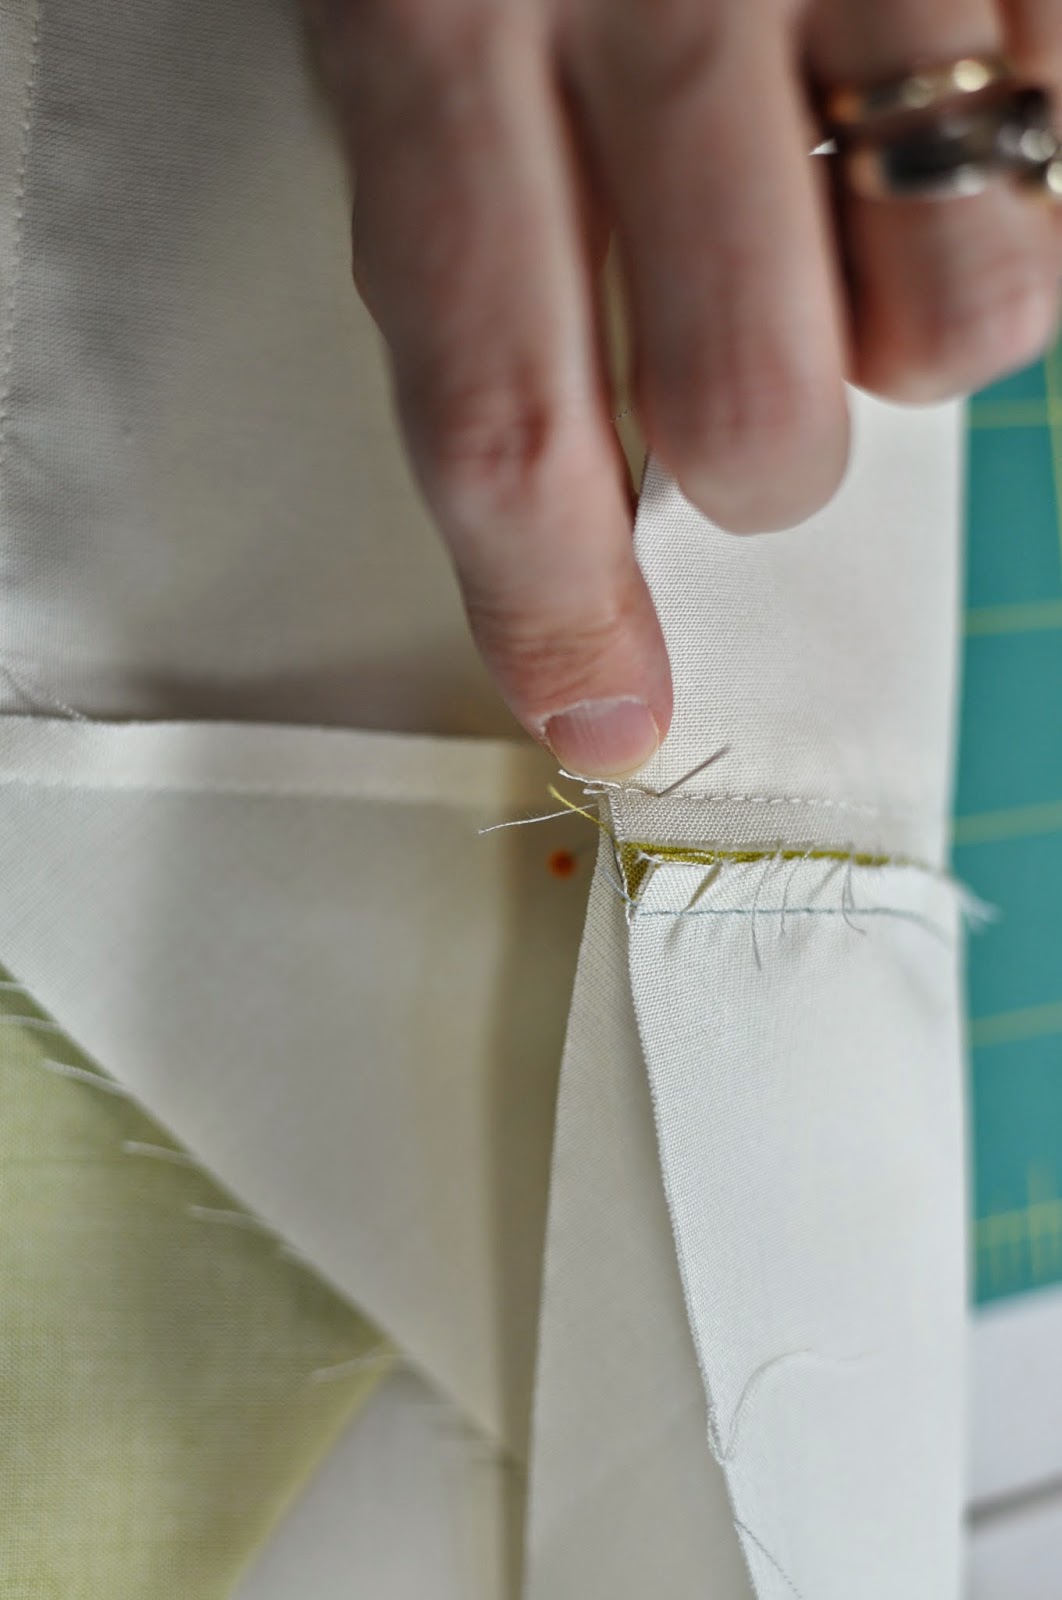
Repeat for all rows. Press
6. Trim if necessary
7. Sew all rows together to form quilt top, nesting seams and pinning as you go. Press
7. Add borders to sides, Press. Add borders to bottom, Press.
Quilting the Quilt:

TIPS for quilting quilts with inset designs:
1. Use spray baste. 505 Spray baste is safe for babies, four legged or two legged. It will wash completely out in the laundry. It will also keep you from getting gathers on the underside of your quilt as you work.
2. Use a 90/14 needle. Increase your stitch length.
3. Work from the center, out. I machine embroidered the center Love motifs. The pattern can be found here. Do these first.
4. Then quilt your grids. I left two sections with only diagonal lines to add more interest. I'm not sure you can even see them in the final quilt ;) When you are quilting the grid, begin at the center motifs and work towards the edges of the quilt. You can mark your grid with chalk, or if your quilt is nice and square, you can do as I did, and work section by section.
TIP - I used wool batting because it drapes so nicely and is warm but light. If you use wool batting be sure you cannot see the backing through it! Also, it will be fluffier when you are quilting, than cotton, so set your stitch length to 3.5 or more when going in one direction, and then to 4.0 or the next step up when finishing the grid in the opposite direction. This will keep you from getting puckers. Just say no to puckers!!
5. Man, you are going to love seeing that grid happen! It's so cool!! Gloves with sticky dots (machine quilting gloves) will help you to hold the fabric while it moves through your machine.
6. Do NOT stretch the quilt while you are feeding it under your needle! When you release it, it will bounce back into place and cause you to have strange eddies in your work. Ack! Just say no to eddies!!
7. Relax! Take breaks! Don't eat chocolate or drink tea while you're quilting... HeHe ask me how I know;)
Binding:
1. Trim the quilt back and batting even with the outer edge of the borders. Make sure they're straight! Sew 1/8" from edge all around the quilt to stabilize the edge and keep it from puffing up anywhere.
2. Cut 4, 2 1/4" strips of 08 Stockholm. Make one long strip by attaching them on the diagonal.
3. Fold in half along length, press.
4. Using a scant 1/4" seam, sew binding to back of quilt, raw edges together. Here is an excellent resource for remembering how to join the ends of the binding together on the diagonal when you get to the end. Easy!!
5. Go to the ironing board. Fold the binding up and press straight up from sewing line.
6. Wrap binding around to front of quilt and press and clip in place. See Lynne Goldworthy's blog, Lily's Quilts for several excellent tutorials/tips on binding quilts.
7. Using a binding or edge stitching foot, stitch the binding to the front of the quilt. Don't forget to label your beautiful work!!
Binding:
1. Trim the quilt back and batting even with the outer edge of the borders. Make sure they're straight! Sew 1/8" from edge all around the quilt to stabilize the edge and keep it from puffing up anywhere.
2. Cut 4, 2 1/4" strips of 08 Stockholm. Make one long strip by attaching them on the diagonal.
3. Fold in half along length, press.
4. Using a scant 1/4" seam, sew binding to back of quilt, raw edges together. Here is an excellent resource for remembering how to join the ends of the binding together on the diagonal when you get to the end. Easy!!
5. Go to the ironing board. Fold the binding up and press straight up from sewing line.
6. Wrap binding around to front of quilt and press and clip in place. See Lynne Goldworthy's blog, Lily's Quilts for several excellent tutorials/tips on binding quilts.
7. Using a binding or edge stitching foot, stitch the binding to the front of the quilt. Don't forget to label your beautiful work!!
Here are the Layout Diagram and pdf Templates for this pattern.
Have a blast making it!!
A million thanks to Michael and Lynne for sharing these truly delicious fabrics with me :)
We'd love love love to see your finished works! Post them on the Oakshott Blog, Shotthrough.
A million thanks to Michael and Lynne for sharing these truly delicious fabrics with me :)
We'd love love love to see your finished works! Post them on the Oakshott Blog, Shotthrough.
Don't forget to follow the Oakshott Scandinavia Blog Hop!
Sarah Sharp 5/4
Amy Sinibaldi 5/6
Elaine Poplin 5/11
Sarah Fielke (I know!!!!) 5/12
Nicholas Ball 5/13
Lori Landenburger 5/14
So lovely to meet you!
XX!
Lori





.JPG)
.JPG)


