Showing posts with label bag tutorial. Show all posts

Thursday, April 30, 2015

Sewtogether Bag Tips, Tricks and Links


The Sewtogether Bag is a project bag designed by SewDemented. It has three interior pockets, and space for a needle keep and a pin cushion, if you'd like. I made mine to use for crochet or knitting, so I did not add the rest or pin cushion. My finished bag is 9 3/4" long and ~4 1/2" tall. Excellent for so many uses! Have an artist in your house, hook them up with one of these to keep their drawing supplies organized! Have that special Aunt who has everything? I bet she doesn't have one of these made by your loving hands to hold her sewing or crafting supplies! 
I have to tell you, this was my first experience, EVER, putting in zippers... this bag had four zippers, and, honestly, they were what was keeping me from jumping in and making one, despite the fact that I regularly searched the hashtag #sewtogetherbag on Instagram and drooled over examples made the world over.

But no more!! 


To review the pattern:
Things I liked,
  • You can make it with scraps, or F8ths. No need for yardage.
  • It becomes addicting to pull fabrics for future bags, it is so much fun to make!
  • You can tailor the outside and inside to look anyway you like. Like solids? Use solids! Like large florals? Flower away!! Like a mix? Mix it up!! 
  • The making of the bag is in small steps that are easily accomplished, but which look incredibly polished. 
  • It really is EASY.  Even the zippers!! And I love how Sewdemented thinks! The way this is put together is really eye opening when it comes to designing purses. Her method makes it so easy to make pockets. 


Things I didn't like,
  • There are almost no pictures of the steps. I used Quilt Barn's excellent tutorial, as my main source of info on how to sew this pattern. Really, just go and read it through and keep it open as you go. You'll just zip right through. 
  • You really do need to have a machine that can go through a LOT of layers for the final binding. Luckily, I have one. Otherwise, hand sew the binding on, and hand attach the handles. It's still easy, just wanted you to know :)
Tips and Tricks:
  • Use a Jeans or 100 needle so that you don't have skipped stitches. I now use them for every bag I make. 
  • Follow the order of operations from the Quilt Barn tutorial.
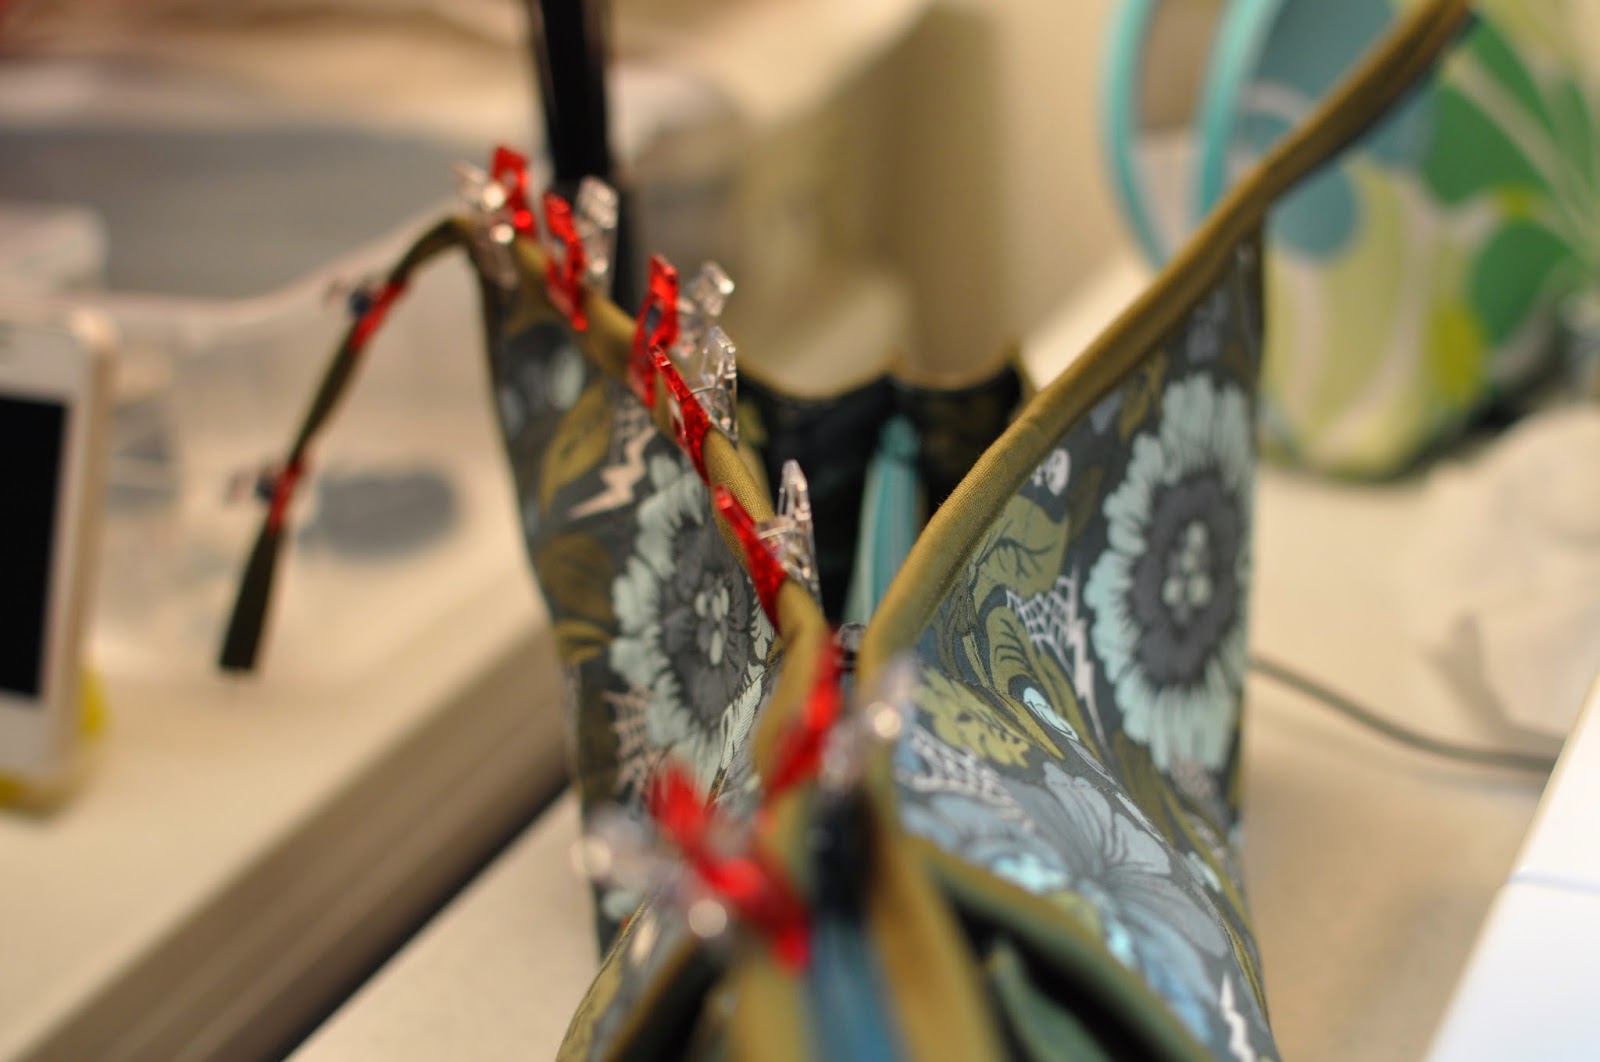
  • Use Wonder Clips to hold your layers together, that way you won't end up with alot of bent pins,


  • Use a thin interfacing. I used a thicker one for my outer layer, and that exacerbated the problem of having too many layers to easily and neatly sew through at the end,
  • Take your time and take pains with your topstitching. It'll really pay off! 
  • Have fun choosing your fabrics and zippers! The zipper choice really shows.


  • Use Quilt Barn's technique of filling bobbins with your threads, and sewing from them in the bobbin and as your top thread. Did you know you can do that??! I never thought of it! Having a bobbin on my top post that matched one side I was sewing, and one in the bobbin that matched the other side, gave my stitching real polish, as every stitch matched the fabric it went to.  Then, when I flipped the bag over to stitch the other side, I just switched bobbins. What will they think of next??! I'll be doing this on all of my small projects!! 
  • I will use a 20" or 22" zipper for my top zipper from now on... it will allow my Sewtogether Bag to lie more open while I am using it. My quilting ladies point out that if I do this, my stuff may fall out... Whether or not you do this depends on your intended use... and besides, who doesn't want to see my stuff all fallen out ;0
  •  Make a test bag, and then make 3 or 4 at the same time, after that. 
  • Remember to assemble the pockets/insides in the manner suggested. If you chain piece each pocket separately, you'll have to assemble the inside unit upside down and backwards brain bendingly blah blah blah... ask me how I know!!! Stick with the sequence Quilt Barn shows you, quick, easy, polished!
  • Be prepared. Cut all of your pieces, fuse your interfacings, and have your bobbins wound, in advance. Then you can just sit down and go!
  • DO NOT show this finished bag to your friends. Don't say I didn't warn ya!! You'll be making hundreds and hundreds of them in no time. 


Materials:
Outer Bag - Tula Pink Darkside
Inside pockets - Tula Pink 10" squares
Outside pockets - Kona solids; Aqua, Olive, Moss
Binding - Kona Moss
Zippers - 3, 9" polyester, 1, 18" polyester all from Joanns. They were ironable, which helped when topstitching the pockets.
Thread - Gutermann polyester in Celery, Moss, Dusty Blue, and Dark Teal. I had no problems with thread breakage. 

You can find the pattern on Craftsy, here


I can't wait to see yours!!!
XX!
Lori

Linking up with Fresh Sewing Day at Lily'sQuilts 


and 
Finish it up Friday at Crazy Mom Quilts

and
Let's Bee Social at Sew Fresh  Quilts

And
Fabric Tuesday over at Quilt Story


Friday, April 17, 2015

Mini Messenger Bag - An Easy Beginner Purse You'll Love!

Welcome back to Finish It Up Friday!!

It's been quite a week what with deliveries of long awaited materials, and a new lens for my camera! Woo! 
But what I really want to show you is this just Adorable Mini Messenger Bag by Katy Cameron over at The Littlest Thistle. 
Pics taken with my iphone, pre-fabulacamera ;)

Katy is an experienced bag designer, with more than 10 years of pattern design under her belt (or over her shoulder, as it were;) )


I tested this pattern for Katy. I've been testing a lot of patterns lately, and I can tell you that clear and concise is not everyone's forte! 

But it IS Katy's :)

The pattern is well written and laid out, and SUPER EASY!! 
Who would ever think that a messenger bag with pockets, lining, magnetic snaps, and hardware would be easy, but it IS
I have now been conscripted to make many many more for my family members. I hope I get the chance to make one for myself!!

Here are the things I like about this pattern:

  • There are no zippers, so beginners don't have anything standing in their way
  • The directions have clear photos that accompany them and show you what to do. I love that! 
  • The bag is just the right size. Not so mini that it's only good for kids, and not so large that you can fit the Universe in there. I can fit my Nook, wallet, keys, assorted lip junk, the mail, and a candy bar (or heck, three!) in there, easily. You go ahead and stuff yours full. You know you want to!! I like to travel light and fast. In case I need a speedy get-away!


  • You can easily add pockets anywhere you like. I might add one or two in the gusset, inside and out, to put extra stuff into... I like getting to some things without opening my bag. (See aforementionned candy bars/gum/pens)
  • I LOVE the instructions for magnetic snaps!! Again, PICS, and makes so much sense. 
  • I like an adjustable strap when I am making for other folks, because then they can tailor the length to their likes, and not hate me because the length of their strap isn't just right. I know you know someone like this.
  • It is so much FUN to choose fabrics for this bag!! Mix and match, and you don't need very much fabric! 
What I don't like about this pattern:
  • Nothing. Really! It went together so quickly!! 
  • You will have to make dozens for other people. You better make one for yourself, Pronto!
I made this bag for my Niecey, who is 9. Here are the particulars:
Fabrics:
Raccoons by Tula Pink
Dragonflies by Could 9 Fabrics, Across the Pond
Purple Decorator weight stripe, Joanne's 
Pellon TP971F Fusible Thermolan from Joanne's 
Scraps of Eggplant Kona Cotton
Aurifil thread. The Best!


 Note: When the purse has anything in it, the inside pocket does NOT show, as it does in my pics. 


To buy this pattern, click HERE. You won't be sorry! Post your pics, we have to see them!!

XX!
Lori

Linking up with the wonderful Amanda Jean at Crazy Mom Quilts for Finish It Up Friday! Woo!

And


Friday, September 26, 2014

241 Tote and Tutorial Round Up

That's right folks, you heard it here first,
I made a 241 Tote!!!


 The 241 Tote is by NoodleHead Designs.  I just cannot say enough good things about this pattern!
I have never made a tote, bag or purse before, and was very trepidacious about venturing into bag making. I thought; Sooo many pattern pieces, Sooo much cutting, Sooo many words for which I have no meaning. So many weird sections of JoAnn's that have names like stabilizer and interfacing and sound much too much like software developers over for a double espresso and a rehash of last nights error code re-writes! 
But, NO! The Noodle Head 241 Tote is simple to make, very logically and carefully laid out, and very well written. And just so you will no longer fear leaping into places Gucci would fear to tread, I have gathered the very best of the 241 Tote Tutorials and have them here along with a coupla pointers of my own; Ready for you to drink in and drool over, cause you won't be able to wait to get your hands on one of these!!


The 241 Tote is good for Country Living, gardening or picking up the kids.


The 241 tote is great for Urban exploits as well! That Tote makes that
motorcycle look BADASS, don't you think??!!!

Materials used in the making of this bag:
Pellon interfacing (Gasp!!) ES114 
Grey Peppered Cotton by Pepper Cory
Kona Solid in Orange on the inside of the pockets
Denise Schmidt for Joann's Orange and Navy plaid for center body and handle. 
Light Grey polyester thread by Gutermann. I know! But my machine like polyester thread, what can I say?
Pfaff Bi-Level binding foot for edge stitching (I'll tell you why in a sec)

So, to review the pattern:
1.  I purchased a pdf pattern straight from NoodleHead's website. It was quick, easy, and painless. Then I printed it out using my home computer and printer onto regular ol printer paper. Since I now, unfortunately, have Windows 8, it was a bit of a run around to print the pattern out at normal size as Windows 8 wants to reduce everything to fit. Long story fairly short, if you open up the pdf file and print it from adobe acrobat, you should not have any problem Dont forget to check your pattern for size! There is a one inch measurement square on the first pattern piece. 

2.  I then cut the pattern pieces out, taped the A-A and the B-B, double checked that this was indeed the case, and having ironed all of my fabric in advance, weighted the pattern pieces and cut around them using a small rotary cutter. Easy peasy!! Don't pin your pattern to your fabric, as it distorts the pattern quite badly. 
I followed this tutorial by Katy, The Littlest Thistle, for pattern layout and cutting instructions. Ba-rilliant!! Then I read through this tutorial and review by SewSweetness, Sara Lawson. I just want you to know that I clipped my seams about a hundred less times than they did, and they lay perfectly flat. For now, anyhoo!! 

3. I fused the interfacing to the fabric pieces as directed on the interfacing package, and it has stayed on like a champ. And I am not easy on my purses. They invariably end up under the seat, or the dog, or the Boy. You know what I am saying!! I think that the Pellon ES 114 was the perfect weight for the peppered cotton, as that particular fabric is quite sturdy. If I had been using only quilting cottons, I think I would have used one step heavier of an interfacing. But, like I say, I am pretty hard on my handmades. But I can tell you that I am now going to buy it by the yard from JoAnn's and absolutely use a coupon. The little box that I had was just enough to make this bag, and no extra. I know that other countries do not get coupons or have Pellon... maybe an Etsy seller could help??
UPDATE: Walmart now carries Pellon products for $5 a yard LESS than Joann's. Wowsa!

4. I did NOT trim the interfacing back 1/4 inch like the manufacturer suggests. My theory was that I wanted that stiffness to help the seams at the bottom of the bag and pockets hold up to all of the junk that accumulates in the bottom of my purse... I am not going to show you a picture of that, as I do not wish you to cry ;) 

5. When sewing the darts, line up the edges of the bottom of the bag, then pin...
I am about to move into position to sew a dart, but look! The edges of my fabric are lined up!
Keep them this way!

6. I had no problem sewing the sides of the bag to the central pieces because I used my Wonder Clips.., Man, those things are some kinda heaven!! One Tip: pin/clip Starting, NOT at the seam intersection, but out at the ends of the side, and work your way back to the curved seam intersection where the bottom of the side meets the bottom of the center of the bag... This will keep your side centered and ease the complete side into the bag.  Go to SewSweetness's tutorial for a pic of the side insertion. 

7. If you have a Pfaff, and you want to topstitch, you will not be able to move your needle over and use your stitch in the ditch foot, or your edge foot, because there is only a central hole in Pfaff feet. No broken needles, thank you!! So you can either wing it, and risk wandering top stitching, or you can purchase the handy bi-level binding foot.  It has a large and small side to the foot, and a solid front, so that you cannot see what you're up to. If they'd asked me first, they would have known better than to do that. The sides of the foot are undercut so that they help to guide the fabric. Move your needle to the distance from the edge of the fabric that you wish, and go ahead and stitch. This is the first time I have ever had top stitching come out looking like anything that could leave my house. 


You can just barely see here how the right-most side of the foot is undercut. If I was doing binding, I would have the left-most side of the foot cuddled up against the edge of the binding and the rightmost side of the foot riding along the outside edge of the binding. I would move the needle right until it was the desired distance from my edge to stitch... here it is way too far over for topstitching!
Better!!

8.  If you have a lightweight machine, you are going to want to hand crank your way over the intersections of the pockets. I'm just sayin... no need to break your machine just to have some lovely stitching! 

This is the intersection you will want to hand crank through.
9. I used a titanium needle for the first time. It didn't make it all of the way through the bag before skipping stitches and dulling. I switched to a universal 90/14 and finished up with no problems. Has anyone else ever had this happen??! I was really hoping that titanium needles were the answer to fewer dull needles in the middle of projects... 
    *Update! Read Katy's comment at the end of the page to see why you SHOULD always use a 90/14 needle and trim your interfacing, both! 

That's it, folks!!! Please stop by the tutorials and familiarize yourself with the process, and then jump right in!!! 
I leave you with a bevy of pics of 241 totes other sewists have made. I sincerely hope that you will try one, or a dozen, yourself! I know I am!!!!!!!!!!!!

XX!
Lori

Denim, Perfect!!


Ooh, Elegant!

Suhweet!!!!
For another review, check out Red Pepper Quilts
For info on Interfacing go to Sew Sweetness
And for a tutorial on how to insert a magnetic snap go to Noodlehead 


This 241 tote is a finish for the FAL3 over at The Littlest Thistle! Woohoo!!!!
Linking to:
Finish It Up Friday at Crazy Mom Quilts 

AND
Holy Mackerel! Did you see that Craftsy has 70% off??!!


Check it out!