Thursday, September 24, 2015

SewPsyched! Quilt Auction for Charity! Plus Quilt

SewPsyched! CareAlong

It's time for another SewPsyched! CareAlong, where you bid on a hand made piece, and half of the proceeds go to a Charity or Person of your choice!! Last year, we raised $400 for Charities all across America! 

WOO!
This year, I am auctioning off my marvelous Being Charming Is A Plus Quilt.
This lap quilt measures 58 1/2" x 46" and is a bright bundle of wrinkly goodness!!
I used all Aurifil 50 wt cotton thread in the construction and quilting of this lap quilt. She is so soft!!
I used all Kona Cottons Solid fabrics in this Plus quilt. They are already so soft after only one wash, but because they are broadcloth, they will wear like iron and keep their colors bright, so your favorite recipient will have this little quilt FOREVER!
I love this little quilt so much, that I almost can't bear to part with her.
My Husband may never forgive me for sending her on!
I mean, just check out that wrinkly goodness!!
I quilted her with Wonky lines and outlined the Pluses, so that she is as interesting from the back, as she is from the front...
 The backing is Kona Cotton in Chartreuse. This picture does not do it justice. It is a vibrant, fun color!
The Being Charming Is A Plus Quilt is bound with Ombre grey fabric, so that she shimmers around the edges like a charming folk do :) I used Lynne Goldworthy's method of binding, so that she can take a lot of dragging or hanging around. 

Now, don't you think you  need this quilt for your favorite Math Teacher, littlest Kiddo or that favored Man in your life??? 

How It Works:
  • You bid on the quilt on Instagram, on Facebook, or by emailing me. I will be updating all three avenues, continually.
  • Opening bid is USD $150.00 This is how much it cost me to make the quilt, not including time and love :)
  • Winning bid is notified via the avenue through which you bid (Instagram, Facebook, email)
  • You pay SewPsyched! through Paypal.
  •  You choose your charity, and I will Paypal them the proceeds, immediately. I also forward you the receipt. 


Bidding begins
October 2, 2015

8 am Alaska Time
12 Noon Eastern Time
10 am Central Time
9 am Pacific Time
5 pm in the UK and the EU,
and
2 am FRIDAY October 3 in Melbourne

If you purchase this Being Charming Is A Plus Quilt, and are from outside of the USA, I will pay HALF of your shipping costs. Because I so appreciate folks who want to give back to others!

Let's get out there and do some good in the World!!

Last year's recipients were:

Catholic Charities
Seeing Eye Dog Program
Ovarian Cancer Research
Bat Research
Breast Cancer Research
Shelters for Abused Women and Children 
and an individual's entire stash for a year!!

See ya FRIDAY, OCTOBER 2!!

XOXOXO!!
Lori


Oh my Gosh!! I could snuggle up and take a nap, right now!!!!
Soooo soft!

Linking up with the ever Fabulous
Finish it up Friday :)

Wednesday, September 23, 2015

WIP Wednesday Teal and 241 Totes Galore!

I've just returned from a weekend retreat with my Quilting Ladies. 
Fall has come to Alaska. Glorious cerulean skies, crisp breezes and Golden Yellow birch and aspen. My quilting lady Camilla made a mid-sunday raid on the crab apple trees outside of the community library, perchance committing some sort of fruit felony? And brought us all luscious crab apple butter for our hot toast. That Camilla. She really knows how to treat a girl!!

This time, our retreat was in a center located near Kenai, and a lake with loons. Not us, the avian kind :)
I love to wander through the leaves and smell the Fall scented air. 

The roses have all made hips, packed with vitamin C. It is some sort of banner year for them, I have never seen them so big and luminous. I'm thinking a quick forage and a make of jelly is in order. What do you think? 


I'm working on four more 241 Totes. Please excuse these miserable pictures. I'll take more tomorrow, But I bet you won't see finished totes by Friday! Lol!! That's because I'm working on these exciting projects...
I'm enlarging the Modern Dogwood pattern so that you can cut all of the curves with your Sizzix or AccuQuilt cutter. They will be MUCH quicker to piece into a quilt, as this will make each block quite big. I can't wait to show you the finished quilt that I am making for you!! 
I am working on a Modern Dresden for Quilt Con. If you pin this, please reference me :) I think it will make a super fun quilt!! 
I'm also working on this Triangle Dresden for the Teal Mug Rug swap to increase awareness of Ovarian Cancer. I hope my recipient likes it!! 
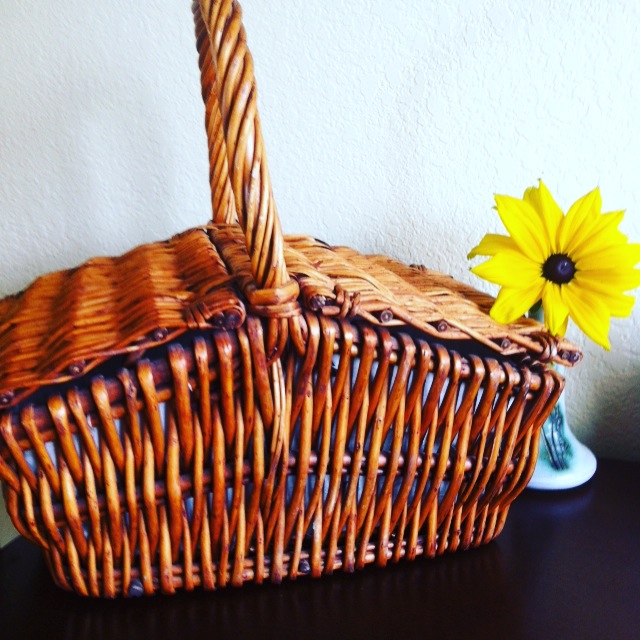
And check out this SWEET basket I found at a local Value Village!! I'm going to redo the inside in Cherry and red polka dot fabric. Fun!!
My Rudbeckia's are still going strong, despite the fact that we just had a frost... oh yeah, I better get the potatoes in!! 
These red berries are favorites of bears. How do I know, you ask?? Well, you had better watch your step out on the trails just now, or you'll know how, too!! ;0 (which, by the way, answers the Age old question with a resounding, YES!)
Skookum's cousin, Bacon, is visiting us for three weeks. Man, are we having a BLAST!!

Now, don't forget!! If you head on over to Calico Cat Fabrics to steal some fabric, use the CODE SEWPSYCHED  to get FREE domestic shipping on ANY order of $50 or more. The code is good for all of September, so you had better get shopping ;0
Tanya has some Lecien on sale for $4.15 a half yard. I will literally sew for the cats, with prices like that!

XX!
Lori

Thursday, September 17, 2015

Dottie Angel Frock Tips and Tutorial links

You read it here, first, folks! I've actually made a garment!! 
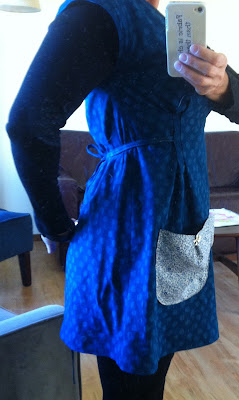
Meet the Dottie Angel Frock - Tunic Length!
I'll give you a short run down of what I did, as a newbie garment sewist and the World's Slowest Quilter, and link to other tutorials along the way. 
I hope you find this review useful! If there is anything more that I can do, like make three more to be sure of my tute, I'd be glad to help as much as I can;0

Materials:
Blue dot linen for body
Fat 8th of Liberty Tana Lawn for the pockets
Fat 8th of linen for pocket linings
I figured linen would give me the slouchy look I wanted, and quite honestly fit in with my ethic of Never Ever Again ironing clothing to wear. 

Let's start from the beginning:

Step 1: Measure yourself. Be honest here... no fudging on the waist/hips/bust. Now is not the time for solemnly swearing that you will stick to that diet and start going to the gym every day, so the garment will fit perfectly at some future imagined date. Measure honestly, with a flexible tape. Here are tutorials on how to do that. 


Step 2: Cut out your pattern. Now, if you're like me and have never sewn a garment, let alone one from this designer, you will be faced with a plethora of choices of sizes, and three styles, from which to choose. 


  • For the Dottie Angel Frock, I would suggest going up at least one bust measurement IF you are going to do as I did, and make longer darts. For instance, I cut the 38 1/2" bust size Small (8-10), although I'm a 36. It fits EXACTLY right, with no wiggle room, in the bust and under the arms, because of the two darts. I'm moderately cushioned under the arms, so you should choose based on your bust size, and on how much extra room you will need for movement. The back of the dress is very roomy, which does give you more leeway. 
  • Honestly, I still wasn't sure, so I cut out the pattern piece I thought would be right, and held it up to me very carefully, matching the finished shoulder seam with the seam on the shirt I was wearing, and pinching the pleats... This will give you a very rough estimate of fit, and definitely tell you if the size you have chosen is too small. This is a good beginner pattern in this way, because as an A-line dress/tunic, it is very forgiving as to body part coverage. 
  • You're supposed to use pattern weights, instead of pins, to secure the pattern pieces while you cut them out... But you know that the only kind of weights I've got in the house are Pie weights, and they roll all over. Sigh! So, if you do not have any weighting mechanisms, such as vintage ashtrays, the cat or clean and empty tea mugs, pin in this manner: Begin at the top, and smooth as you proceed to pin from left to right and left to right, down the pattern piece. Be sure there are no lumps!! Place the pattern pieces in accordance with the instructions.
  • CUT INSIDE THE LINE, when cutting your fabric/pattern piece. Why? Because that's the way professionals do it, and it will give all of your future garments better fit. Here's the person who says so:  Fashion Incubator A fascinating read into why you should cut accurately, and how to do so. 
Step 3: Mark your fabric
  • I have grey and white chalk, water soluble pens, and wax pencils, to use to mark objects in the Work Room... I chose to use a grey wax pencil because I couldn't find the 52000 white wax pencils I have somewhere, and because it would show well against the dark fabric and not wipe off or smear. 
  • Here is a great tutorial all about marking patterns. Who knew??!! Professor Pincushion I apologize for the annoying 3 second ad.
  • Mark the Tucks. Measure the length of the dotted line, and draw a line on your fabric, or pin to mark this length... I used pins, and increased my darts by 2" longer at the bottom, as I wanted a more fitted look. 
  • Mark the fabric at the dot as this is where you will center your tie, later.
  •  Mark the Pockets. 
  • Do you know the Pin Method of marking a pattern?? Put a straight pin through the pattern piece Dot mark, and mark the fabric with a pencil or other marking device, where the pin touches it, as it comes out of the back of the pattern piece. Brilliant!!
  •  Mark the Fold line and the beginning of the sleeve from the side (at the dot, see below)
(See below in Sew section for more about sewing the sleeves)
  •  Mark ALL of the tabs and the pocket placements!

Step 4: Begin to sew!
Follow the steps in the excellent instructions. 
I changed the pockets because I wanted to line them to help my Tana Lawn be more sturdy so I could put my phone in my pocket, and because I didn't feel like making the top band for the pocket. 

Sew the Pockets
  • Weight/pin and cut out the outer and lining pieces for two pockets, following the layout diagram in the instructions. 
  • Mark your fabric at the pleats.

  • Place pocket lining and outer fabric Right Sides Together (RST).
  • Pin at the pleats, and around the outer edges. Notice that my pleats are marked by pins of a different color. 
  • Beginning at Marked Pleat pin, sew around the outside circumference of the pocket with a 1/4" seam. End at the Second Pleat Pin. 


  • Clip the curves. Notice that you clip a little triangle out of the fabric. 

    • Clip the corners

    • Turn the pockets through the hole, between the pleat marks, right side out.
    • Smooth out the sides and poke out the corners, Press 
    • Fold pleats at line and pin in place.
    • Topstitch TOP of pocket. If skipping pocket placket like I did, backstitch at pleat to be sure it will stay in place, then continue sewing across top of pocket. I topstitched mine at 1/4" so that the topstitching would match the seam when I sewed the pocket to the tunic. Two lines of stitching, one at 1/8 and one at 1/4, would be pretty, here, as well :)
    • Pin pocket in place on tunic front, matching dots.
    • Try the tunic against yourself at this point. Check that you do, indeed, want pockets in this exact place. Notice that I have moved mine...
    • If you have extra stomachage that you wish to conceal, place the pockets closer together. If you're looking for the waif look, place them farther apart. 
    • Extra special FYI... if you, ahem, have delicious bosoms that happen to be different sizes than each other, this will effect how the final garment hangs on you, and will make your pockets fall in a different place than you think. For instance, if you're me, one of the pockets will fall dead center on the tunic front... and the other will be lost off to the side somewhere. Go ahead and wonder clip the tunic back and front together and gently wiggle into it. Pin the pockets where you think they can't possibly be a problem. Gently wiggle out, taking care not to stab yourself with the pins! Or just unclip the wonder clips, lol :)
    • OR, you can make a large apron style pocket across the front which would not only be super handy, but cute as heck!  
    Sew the Tie
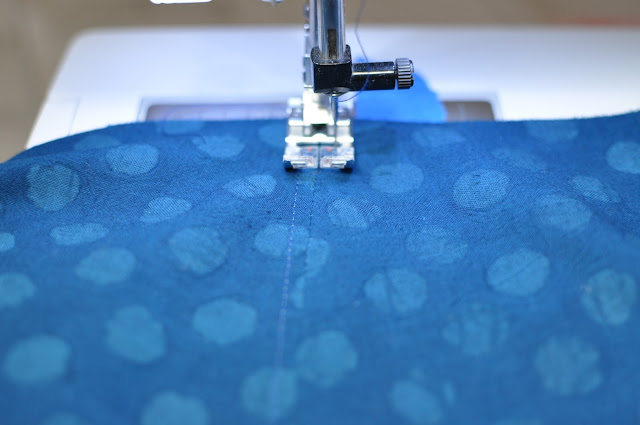
    Sew as per the instructions. I used contrasting thread so that you can see what I'm talkin about. 

    Sew the  Front Darts


    •  I back stitched at the top and bottom of my darts, cause, honestly, they have a lot of work to do! 

    •  What I would CHANGE: I inserted the tie into the middle of the dart... because I forgot to check for the marking. From now on, I will insert it into the top of the dart, where the marking is, as that will give me an Empire waist look, and also work better to control the extra fabric from the back... See how mine has extra fabric under the arm? I may add elastic across the back of the tunic to make up for my bone-headedness. Try on your garment and mark where you would like YOUR tie to go. If you look at the pic on the pattern package, the tie is high up in the dart. Your final product will come out looking exactly like the pattern, if you follow the instructions. Nice!! 

    Sew the Shoulders


    •  Top-stitch on either side of the seam
    •  I pinked my seam allowances with shears. I hear there are rotary cutter pinking blades. That would work wonderfully on this pattern!
    Sew the Neck

    (Hint: Tuck the ties into a pocket to keep them out of the way :) Otherwise, I guarantee you, you'll sew them into a seam!)
    • Following @Happyzombie's tutorial over on Instagram, I chose not to bias tape my neck edges. Cause I'm lazy. Or a rebel. 
    • If you sew the neck in this way, it will make for a LARGER SCOOP... Just letting you know, as it increases the way the sleeve hangs from the shoulder... 
    • Clip the neck edge slightly less than 1/4", ALL of the way around the neck, shoulder, neck. 

  • Fold over 1/4", towards the INSIDE of the garment, press, using steam if you like
    • Fold over again, and press, holding in place with wonder clips (pins'll stab you as you go around sewing the neck)
    • Sew neck down, topstitching along edge farthest from the neck hole. 
    Sew the Sleeve tops

    • Try Frock on, marking where you want the sleeves to meet the sides.
    • Fold fabric over 3/8", between your marks, or the original marks from the pattern. Clip every inch or so along curve. Press.
    • Sew a 3/8" seam, then topstitch. I've used contrasting thread so that you can see, here.
    • Pink the seams so they don't ravel. Oops!
    Sew the Side Seams
    • Pin at marks. 
    • Sew beginning at underarm mark.
    • I didn't french seam my seams. I just pinked them... lazy lazy lazy. Or efficient, as I didn't have to worry about how to get the underarm seam to look decent this way ;0
    Sew the Hem
    • Fold the hem up 1/2", press.
    • Fold up 1/2" again, press 
    • With the garment inside-out, Top-stitch 1/8" from top of fold. I started and ended at a side seam so that I could back stitch without it being obvious. Make sure that you want your hem to be 1", if not, adjust the size of your seam, accordingly.
    I think I hemmed mine at 2", which is too short to wear with leggings... at least for me!


     I can't wait to make the dress length! I think it will flow more nicely, and be super comfortable in linens. 


    For more info on the Dottie Angel Frock, follow Dottie Angel on Facebook, and check out:

    Happy Zombie - I adore this girl!

    The House on Hill Road - Instructions on how she made her Frock. She did all of the stuff you're supposed to do a la the pattern. Her frock is stunners!

    Christine Haynes - Cutie!!

    Pleasant View School House - Two fabulous versions

    I am making at least two more Dottie Angel Frocks, in the dress length. They are addicting!! Please do let me know if you make one, I'd LOVE to see it!

    XX!
    Lori


    Linking up with Crazy Mom Quilts for Finish It Up Friday. Woo!!