I am so psyched to be part of the Triangle Quilt Along over at The Sassy Quilter! But hey, those triangles can be much harder for beginners to handle than you would think. I was having terrible triangle turbulence, myself. So here are a few hard earned tips to help you Keep Your Points, and your Sanity.
1. Cut 5 or so extra triangles. Heck, make it 6. Sew these together in groups of 2 in your usual manner. Check to see if you have enough leeway at the top and the bottom of your group to get a seam in there, without cutting off the points, when you sew your groups/row together. If not, Read on!!! All will be well!
 |
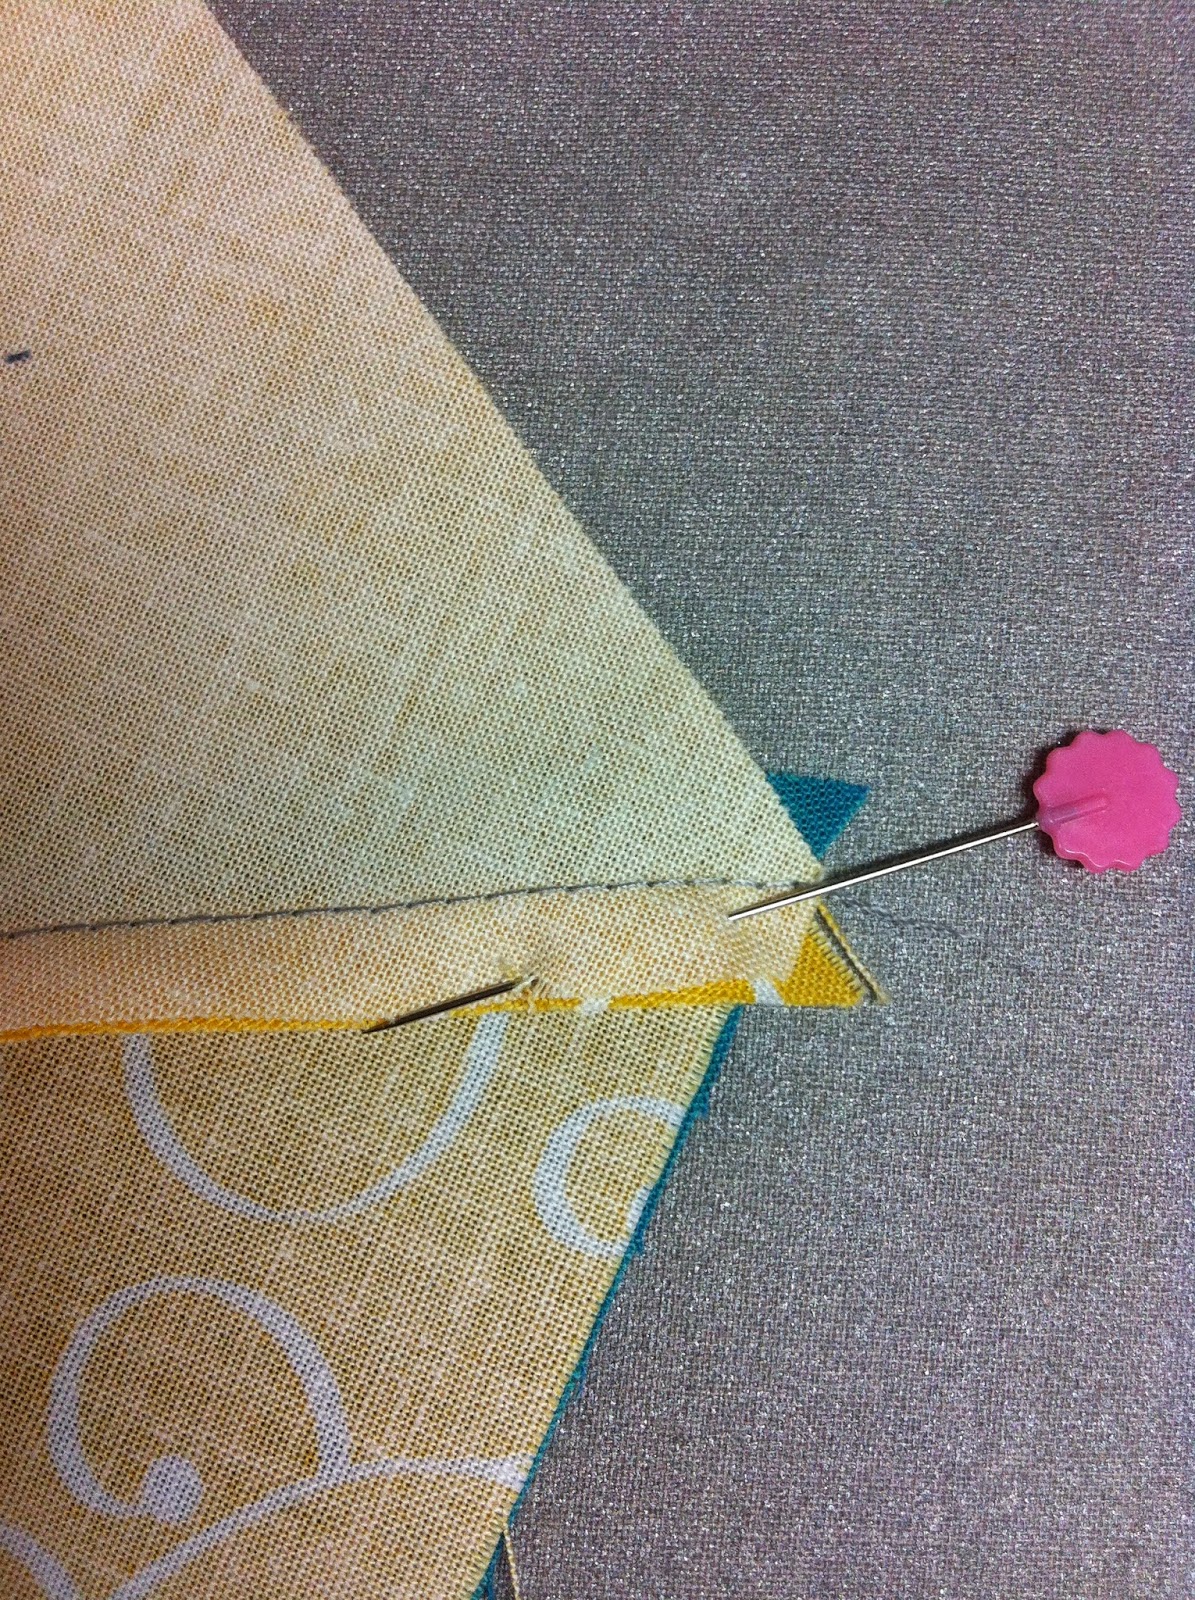
| See where the yellow meets the stripe? There is no way that is a 1/4" or more, I will lose my points, and my mind, trying to sew this into rows. Time for a redo. |
2. Adjust your initial triangle sew together so that you do have a larger amount of overlap of your triangles. Move the triangles up, move them down. The more you adjust and practice, the better your result will be. This will mean that you will need a true 1/4 inch seam or slightly LARGER. I know! The quilt fairies will not come in the night and undo all of your stitches, leaving you to do them again. Make sure that you try this on your extra triangles, so you have your seam allowances decided before you start your quilt. Or if you already have started, never fear, we can fix that. Once you find your good seam allowance, write it down and mark it on your machine! Use a piece of painters tape as a guide. It's super easy to remove and you may already have it laying around.
 |
| Much better! I moved my triangles so there was more overlap. Now I have plenty of Seam allowance below that blue point and above the yellow one. See it? |
3. Now here's the MOST IMPORTANT STEP. Take a picture of your quilt top as it is laid out on your design wall or floor. This is a must! Be sure you have every row pictured. You will be so glad you did this if you accidentally shuffle your triangles as you are sewing!
 |
| Nope! I left off the bottom three rows and late at night mom sewing meant that that got ugly. |
4. The second most important step: Sew your triangles, for each row, together in groups of two. Stack them so that the last in the row are at the bottom of your stack, piling up until you have the first two in your row on top of your stack. I had the leftmost triangle on the bottom of the pair and the rightmost one on top. Then I angle the pair so that the seam I am going to sew is straight up and down. Match and pin, as per the Sassy Quilter's tutorial. Sew.
 |
| Good idea to label rows!! |
4A. IRONING. Here's the rub. I tried three totally different styles of ironing my seams for this quilt. And one was good, one was sort of ok, and one was a disaster! So here it is. I am sorry if I am stomping on your favorite seam ironing technique. This is what worked for me. You have to iron as you go. I don't use steam, as it leads to me stretching my seams and warping them. But that's my problem, not yours. Row 1, iron your seams TOWARDS the first triangle (the beginning of the row). This is left for most folks. You will need to iron your sets of two triangles with some thought as to which one is towards the left. But because you have a picture of your quilt (you took one, right?), a quick reference will soon set you free. Take your time and set those babies well. Then,
5. CHAIN PIECE THE REST. You can go more quickly if you continue to chain piece and here's how to do that without losing your place or your mind:
 |
| Triangle #1, UP, triangle #2, DOWN |
* Take the first triangle set from the top of the pile and pin it to the set you left on the left. Here is how that pinning will look:
 |
| See the diamond that is formed by the second set of triangles?? If your first triangle is point UP, your diamond will be oriented down, like this... |
 |
| If your first triangle is oriented point Down, your diamond will be oriented UP. See it? So every other row will have diamonds all up, or down |
*Here is what pinning when the points match up, looks like.
 |
| See that this is a corner that is nipped off. That's ok, match the edges of the blunt tip. |
*Here is how to pin when you have ironed your seams to the side, and you don't have points that match up.
 |
| Seams are ironed to the side, and now my points can't match as one is lopped the wrong way. Never fear! |
 |
| Just fold The seam up, match the corners, |
 |
| Fold the seam back down, ..And Pin! |
***If you pinned as in the photos above, you should not need to rip anything out when it comes to sewing your triangle sets together.
6. Continue on, carefully double checking against your photo as you assemble your rows and piece them together. Enjoy the process. Enjoy how clever you are. Enjoy how stunningly beautiful your work is.
XXOO! Lori
Ps, to sew the rows together, go back to The Sassy Quilter's website and check out her tutorial. If you have given yourself enough seamage in these steps, you should have gorgeous points a comin'!!! Hooray!! Post your pics!!!

Wonderful instructions! Wish I had read them before I started sewing my rows together :) haha I got 'er done but man, I had some major triangle turmoil going on!! Your top is beautiful!
ReplyDeleteOh no, not triangle terror! xx! Thank you so much, please link up a pic of your finished quilt at the bottom of this page or of course to the Sassy Quilter so we can share your fab work!!
ReplyDeleteWhat great instructions! I might even consider starting one now. although I may wait until I am well rested to begin lol
ReplyDeleteThank you for going through agony to save me from the same!!!
Great tutorial, Lori!!! Thanks for sharing.
ReplyDeleteIt really helped me to clip the top of the triangles. This way I always knew to keep the clipped point either up or down and did not mix up the bias sides. Great tips on ironing and sewing the triangles together.
ReplyDeleteClever!! Do you all get what Linda is saying? If you have solid color triangles, this is an awesome idea so that you keep your bias, well, in check;) Hugs, Linda and thanks for the excellent suggestion! Lori
Delete