Showing posts with label quilting. Show all posts

Sunday, September 25, 2016

Blogger's Quilt Festival Modern Quilt Category!!

Amy of Amy's Creative Side is holding the Fabulous Blogger's Quilt Festival this week!!

Modern Dresden by SewPsyched! Pattern is copyright protected. 

I am entering Modern Dresden, my Quilt Con 2016 entry, into the Modern Quilts category.

How do you think it will do??? 

She was washed at least 3 times before she went to Quilt Con, and I love her wrinkly texture.


I've never done applique before, but I got better with each of the dresdens ;)) 

Next time I make this pattern, I will use fusible behind them! Lol!!! 


Modern Dresden lives at my son's house in LA, now. Nothing in this world could make me happier than that! Don't you love it when your kids want your work? Love Love Love went into every part of this bed runner :) 

Please stop by and check out all of the other marvelous entrants to the Blogger's Quilt Festival!!!

And VOTE FOR MINE!! ;0

XOXO!!
Lori

If you would like to pattern test this pattern for me, please contact me, below :))

Linking up with the fabulous
Crazy Mom Quilts for Finish It Up Friday
Go  check out the quilts!!

Tuesday, July 26, 2016

The 2017 Quilter's Planner is now on Pre-Sale!

Each Month has a weekly spread with a different FREE quilt block pattern,
And my block Parisian Tiles is the first week of September and in ALL of the print ads! Woo!
You can tailor the Planner to suit your needs.
There is a daily top three to help you keep on track,

Each page has TO-Do lists and Notes, for Quilting, Work, and Personal Life!

Each Month also has it's own full view calendar,

In addition, there are Projects at a Glance sheets, so handy for those of us with Quilter's ADD!

And, there are also Project Planning Pages where you can plan your projects and keep track of your designs!

AND, there are graph paper and quilting practice pages!!


I have to honestly tell you, the Quilter's Planner has saved my bacon on more than one occasion! It SO helps with the Quilter's ADD :) You can keep family, work, and quilting or craft projects in order of importance and organized so that you can get to everything, without having multiple planners or notebooks. And, this year, there is a mini planner that you can take on the go!!! Sign me up!!

So, as if all of that good in one place wasn't enough, you also get FREE patterns from world famous designers, right in the planner, and Quilter's references as well!!
Check out the quilt that got me started in Modern Quilting, Christa Watson's Chevrons! Free in the Quilter's Planner!


What’s Included This Year?

This year’s edition is  full of improvements made from the comments and suggestions you provided, including:
Weekly and Monthly Calendar Pages
Laminated Cover and Tabs to Last All Year 
Beautiful Quilt Photography from the Coast of Maine, by Kitty Wilkin of Night Quilter
More Project Planning Pages
More Quilt Patterns by Top Designers(14 to be exact!), in a Digital Download Format 
Stickers for Adding Flare to Your Planning Pages 
A Pocket on the Back Cover 
Weekly Block Designs (with links to full online tutorials)
Weekly Free Motion Quilting Designs (and links to how-to videos!) 
A Small, Elegant, Companion Book for When You’re on the Go (Add-On Upgrade)
A Color Chart from Cloud9 Fabrics, Cirrus Solids, to help you choose the perfect fabric for your next quilt 
Here is the link to buy your Quilter's Planner while it is on Pre-Sale. Hurry up, though, they ran out early, last year!! Give the page a second to load and please do watch Stephanie's delightful video :)

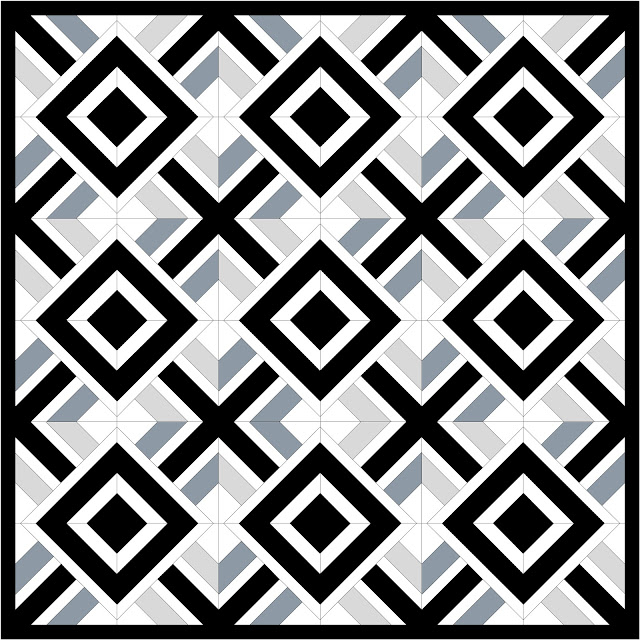
I'll be making my quilt Parisian Tiles in these two colorways, 
A 3-D version, and a Nautical version:


Would you like to join me?? Let's start next weekend, August 5-7 and quilt together!!
The pattern and tutorial can be found on my post, here
I hope to see you then!!
XX!
Lori

Linking up with Crazy Mom Quilts for 
Finish It Up Friday! Woo!

Thursday, March 10, 2016

Paperie SewTogether Bag

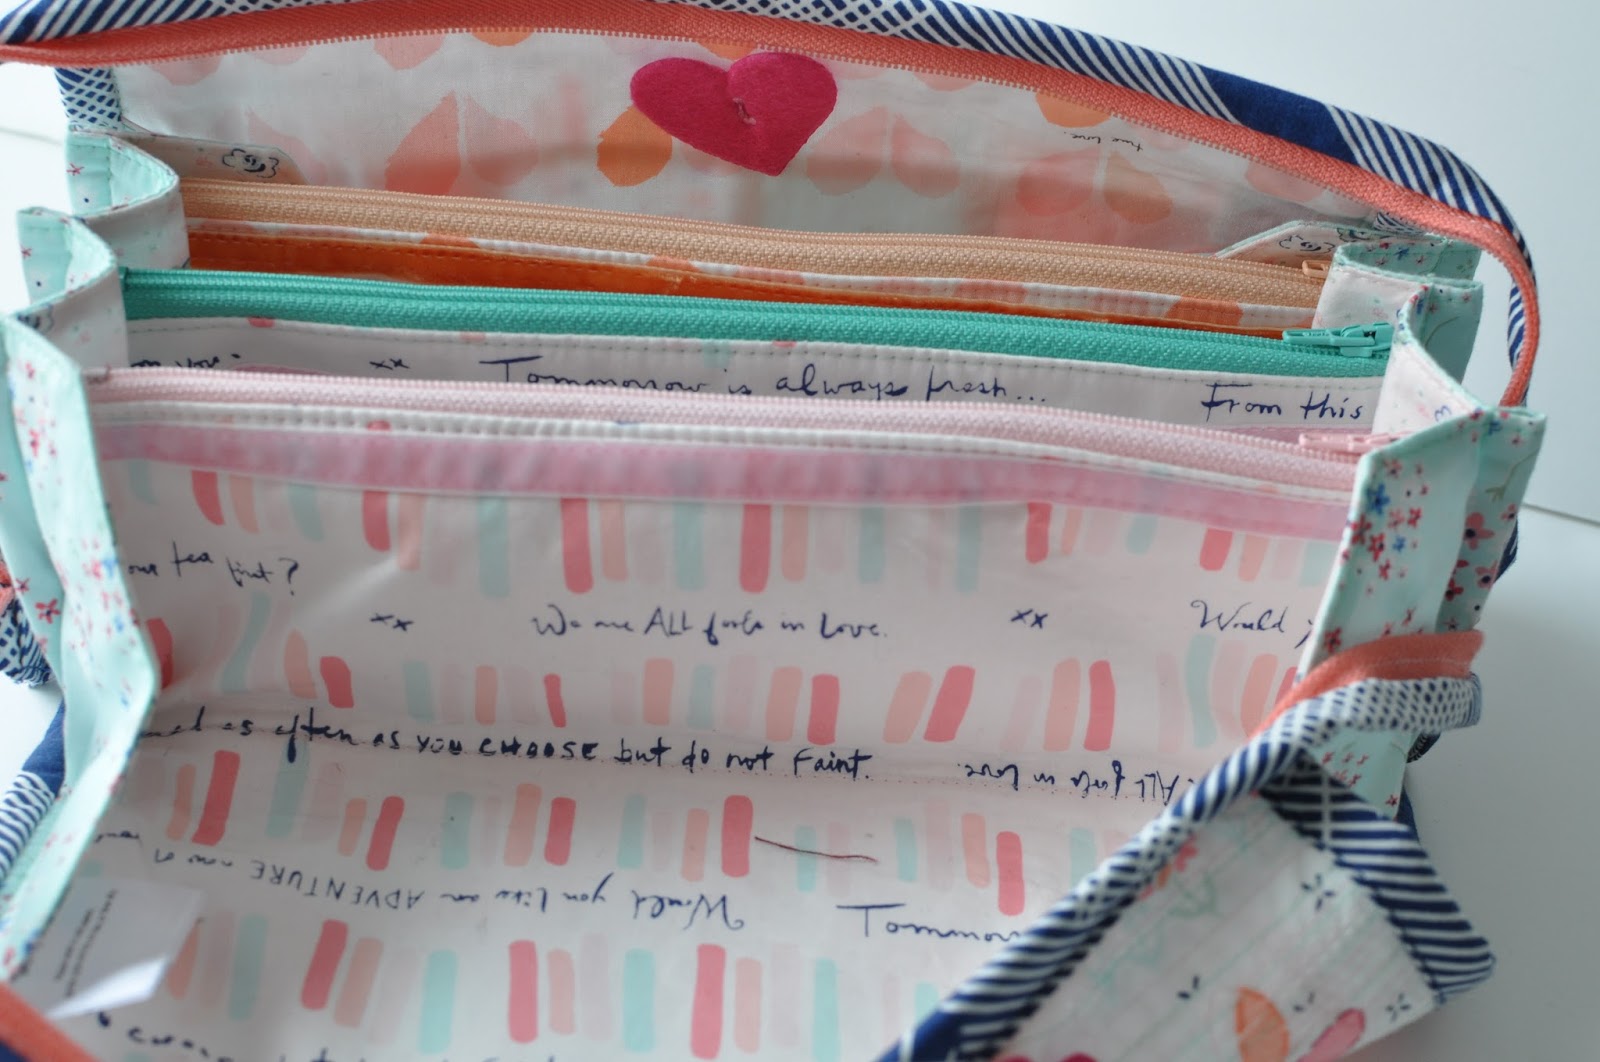
Today's Finish is my Paperie SewTogether Bag. 
Made with scraps from my Paperie
And, man, is it lurverly!!
I hand stitched around all of the red and orange heart shaped leaves from the Gathering Blooms Panel
Then matchstick quilted in Aurifil Seafoam(2835), Light Pink(2423), and Off White(2021) all across the front panel. I only use Aurifil when I sew, and it works like a dream in my Pfaff, Janome and vintage Singer.
When you're constructing your Sewtogether Bag, and you want to add a fancy outside, be sure to cut your pieces extra long and wide, as you will embellish them Before you trim them and sew the bag together. If you begin with sides cut to the correct finished size, your bag will probably shrink and be smaller on the outside than it should be. So cut large and trim down, later!
On the other side, I used scraps of my favorite quotes from Amy's wonderful Paperie fabric, Quoted. So marvelous!! Then I fit in bits of the leftover scraps that were less than 2.5 inches, because I could not bear to lose them and wanted to see them every day. 
And the Answer to the Question, of course!!
I used Eponine as the outside sides, and Manuscript as the binding... I can see owning yards and yards of this marvelous print! 
I used a felt heart as my needle rest :)
And lined each zipper opening in velvet ribbon, with zippers to match. I placed the ribbon lower on the mint zipper pocket, to underline the wonderful quotes that Amy chose to use. Sigh!! Happiness!
The pocket interiors are Kona solids that sing with the Paperie line. The back lining is Happily Ever After, and the inside sides are Cosette. Find the entire line shown with names, here
The bottom is a section of the Gathering Blooms Panel, I added this to the pattern as I wanted extra space at the top of my bag, over the zippers, in case I needed to put a 4"square cutting template or other large object into the bag for safe keeping while I travelled to and fro.
Sweetness!!
Go and grab some Paperie as fast as you can!! It's limited edition and when it's gone, it's gone!! 
That Happily Ever After heart print comes in wide for backings, too!! Drool!!

And as if knowing that all of this lovely is out in the world, wasn't enough, my sponsor, Calico Cat Fabrics, has some very nice sales going on for you!!
I kid you not, she has Tula Pink Plum Ship Shape on sale for $3.69 a half yard. Sheer lunacy!!
Tanya has also just gotten entire ranges of novelty prints, so if a Dr Who Sewtogether Bag needs to be in your future, or a Sewing Themed bag, or Campers  (I mean, Campers!! So cute!!!), or Disney, hop on over and check her out!  All of her Riley Blake and Lecien are on sale until they're GONE!!

So Much Fun!!!
Moose slip on the ice, too ;)


XX!
Lori

Linking up with Crazy Mom Quilts for Finish it up Friday :) 

Thursday, February 11, 2016

EPP - English Paper Piecing Tutorial: Part Two - How to Glue Baste

Welcome to SewPsyched!!

Today's tutorial is about how to GLUE BASTE for EPP. 

Let's get started!! 

Materials:
Fabric glue pen
High quality fabric
Paper or plastic templates

Let's talk Glue!
  • Use FABRIC glue or SCHOOL glue so that it will wash out.
  • Fabric glue has a dye that dries to clear. This dye makes it so that you can see where you have placed your glue. So handy!!
  • A glue pen is super handy as it can be packed anywhere, is not messy, and contains the glue well. Liquid glue will get everywhere. Save it for glue basting bindings.
  • NEVER NEVER NEVER iron your glue when glue basting EPP!! Ironing fabric or school glue sets it and will make it impossible to remove from your papers (you are gluing fabric to paper). Iron glue when glue basting bindings in order to set it and prevent it from slipping (you are gluing fabric to fabric). But never when EPP'ing with papers!!
Let's talk Thread!
  • Use a 50 wt thread. 50 wt threads are light, so will show less as stitches, and are strong enough to stand up to actual use. I use Aurifil 50 wt in a color that matches as closely as possible to my fabric. I may use 10 or more different threads on one project! On this project I used Aurifil 2800, a very pale seafoam, and it blended perfectly with all of my colors. It is also less bright than an off white, so will reflect light less in case any does happen to show. Bonus!!
  • Now is NOT the time to use old thread!! Get rid of it!! But keep the spools for photo shoots and pretty projects. Old thread disintegrates and will fall apart when your project is in use. 
  • To polyester or not to polyester?? That is the question. It's up to your personal taste. I use poly thread when I want more sheen in my work. Since I don't want any of my stitches to show when I'm constructing a piece, and steal attention from my finished product, I don't use polyester in construction. I WOULD use it to decorate all over my piller, though!!

Glue basting is super fast and super easy!!! 

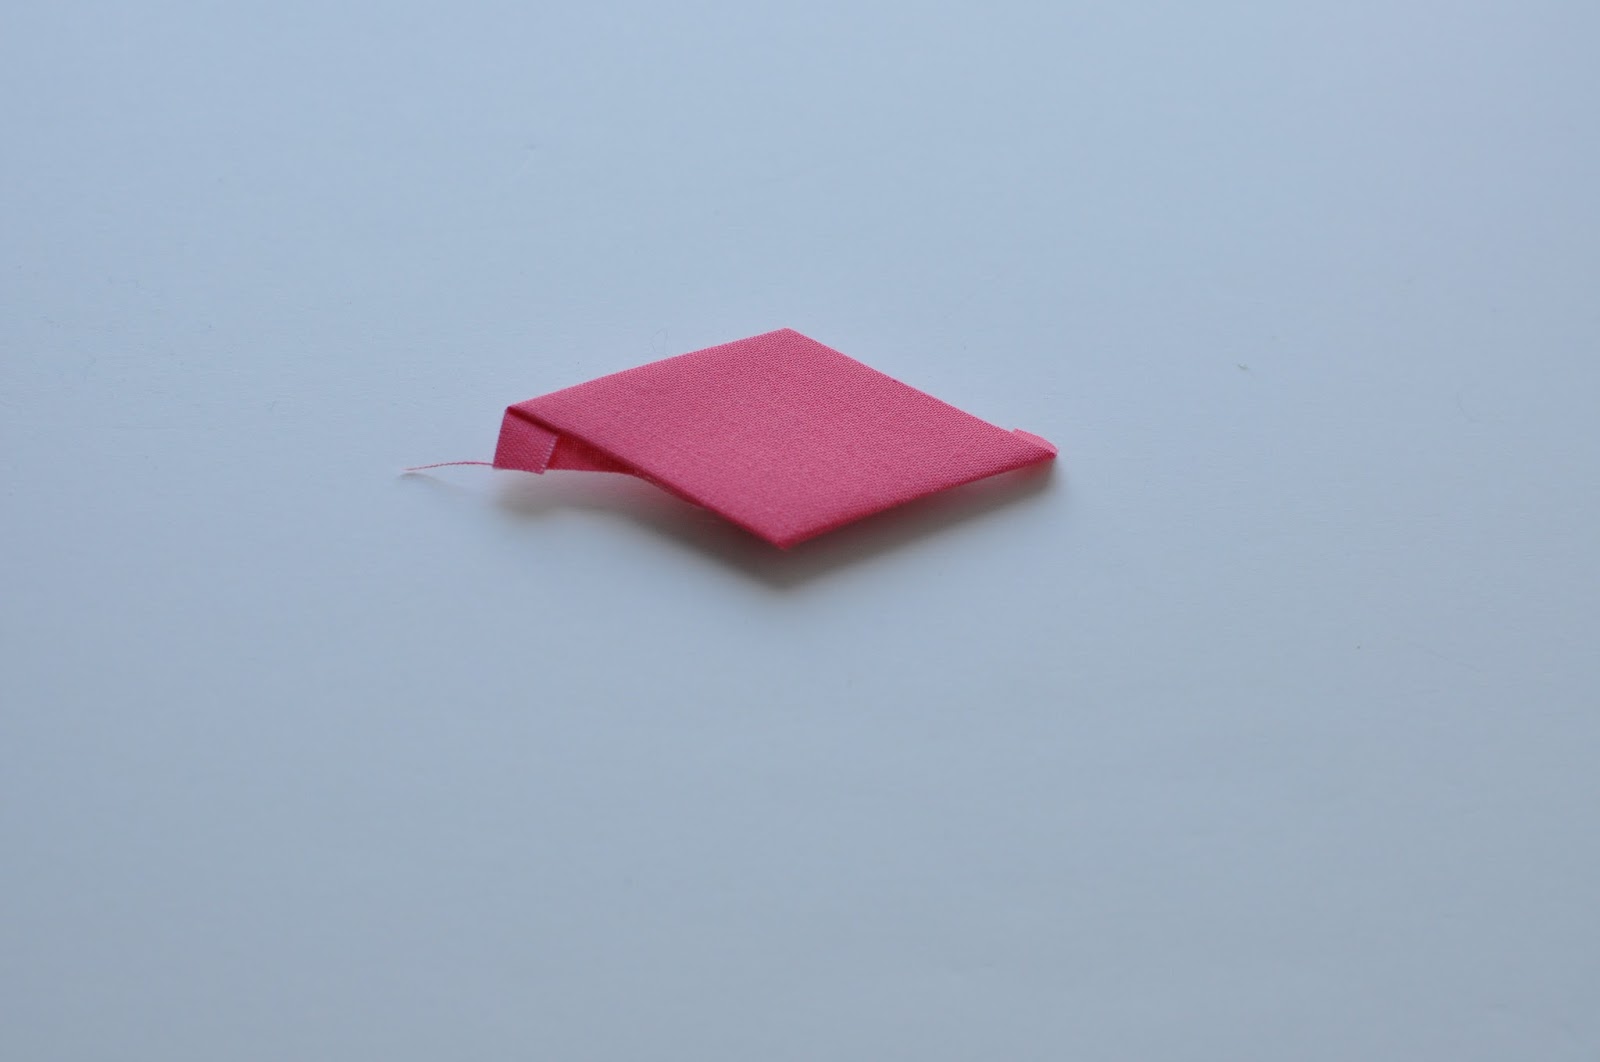
1. Cut your fabric into a shape that is at least 1/4" larger than your template, all of the way around. For my 1.5" (measured across the short middle) diamonds I cut rectangles of 2.25" by 3.25".

2. Lay the fabric in front of you, long side towards you.

3. Place the template at an angle to the fabric. 

NO!! Your points will have fuzzy edges, turn your diamond at an angle.

Yes!!! Plenty of coverage :)

4. Dot a couple of dots of glue on the fabric. You can also turn the glue pen so that you are using just an edge of the sticky surface, and draw a very thin line along the entire edge. They both work equally well to hold your fabric onto your template. It will be slightly harder to remove the template if you glue all along each edge. But no worries!!! Remember, less is more, here!!!


5. Fold the fabric across the edge of the template, maintaining its position on the template. Finger press/crease the edge. Repeat the gluing for the Opposite Edge.
It's important to glue opposite edges so that your template is held securely in the center of your fabric, without slipping. If you glue clockwise or counterclockwise around your template, you will end up with a lot of fabric at the beginning and a very small edge at the end. Ack!!!

6. Now glue dot the sides, fold them onto the template and finger press into place. 

Yes. That is a lot of extra fabric. No, it will have no impact on your final project! I like for beginners to have this extra fabric, so that when they quilt their project, the quilting goes across the extra fabric and gives more support to their hand stitching. That way the stresses of actual use won't pop the hand stitches out because your quilting is going along next to them, in this extra fabric :)

7. If you would like less fabric behind your templates, or are an intermediate sewist, go ahead and make a template that is 1/4" larger, all around, than your EPP template. Cardboard is nice. Or clear template plastic if you wish to fussy cut. Then cut pieces of fabric and glue as per the above instructions. 


Be certain not to pull your fabric TIGHT against the template!!! You'll need quite a bit of wiggle room in order to sew the pieces together!!! See how the bottom diamond looks a little rounder than the top diamond, on the edges. That's much better:) 
The top diamond is going to be AWFUL to sew together with other diamonds...

*TIP*

Never never never never never never never ever never iron your glue basted shapes while the templates are in them!!!

Heat sets the glue and makes it next to impossible to remove the paper templates.

You should never iron plastic templates, anyhoo;) 

Now you know how to glue baste for EPP! 

XX!
Lori


Friday, February 5, 2016

Paperie Giveaway!!! And a Pillow of Lerve!


Today's post is all about

Love, True Lerve
Amy Sinibaldi's new limited edition fabric line, Paperie, brings to mind
All that is good and right with the World. Like little girls in pinafores running through the garden, picking tulips. 
http://townmouse.typepad.com/
Like enjoying an afternoon read on the porch swing with a glass of lemonade and the time to fall deeply into the story you're reading. 


www.lillyella.com
That Amy!! She sure is something special, and it shows in every detail of this fabric line. 
From the incredibly soft hand, to the sweet detail, everything is top notch.
So I knew that I had to pull out my very best for Amy. 
So, of course, I decided to try something I had never done before ;)

English Paper Piecing (EPP)
And boy, is it a blast!!! I Lerves it!!
This entire pillow is hand sewn. A true labor of lerve. Sweet lerve!
You know I had to add some gingham!
I will have better pictures, when the sun ever comes out! But until then, know that this is the softest, most squishiest, most loveable piller in the world!
Come back next Friday for a complete tutorial on how to make this pillow, how to english paper piece, and the pros and cons of glue basting vs thread basting. And, of course, how to make an envelope back for your piller of lerve!!

And now,
For the Giveaway of the Century!!!
Giveaway Closed! Congrats, Charlotte!

Leave a comment below, telling me what you would make from Paperie. Be creative, and please don't use ideas we've already seen in the blog hop :)

I will pick a winner on Monday, February 8th, Woo!!

Thanks for stopping by!
XX!
Lori

Linking up with Crazy Mom Quilts for Finish It Up Friday!

Monday, November 23, 2015

Karen Lewis Stash Additions and a Marvelous Sale!

I returned from Sewtopia to find a *Few* stash additions waiting at my door. As you do, you know...
This luscious Full Panel Club Bundle had arrived from Karen Lewis Textiles. I love how well they go with her pattern from Issue 16 of Quilt Now (available from Pink Castle Fabrics). I adore this mag!! Every single thing in it is first class.
These are her actual screen printed fabrics. What luscious colors!!! And I adore that she has made them herself, and sent them along. I really admire that artistic spirit. I don't think I'll achieve her brilliance, but Someday, I'd like to try my hand at screen printing, wouldn't you? In the meantime, you can join the fabric clubs for half or full panel bundles every two months, or sign up for a full year. If you sign up for January, you will be part of a fun project Karen has going on that includes these desperados!!!
Hee Hee!!! You better bet I already signed up!!!
And these fabulous bundles of Blueberry Park Joy (Bright and Neutral) happened to fall into my bag over at Sewtopia... Or that's the story I'm telling. Not the story where I spotted them across a crowded lobby and lunged like a rabid Vertblatten to reach them before anyone else saw them... And don't you tell that story, either!! 
Now all I have to add to my collection is the Cool Colorway, available through Suppose Fabric Shop. I cannot tell you how much I love this Mother Daughter fabric shop. I'll have a whole post about them, for you, later :) 

But what I REALLY wanted to tell you about is the Cyber Monday SALE that is going to happen over at Calico Cat Fabrics!!! Holy smokes does she have some lovely fabric!! Tanya and I have three coupons for you, so write them down! 

CYBER25 - $25 off of any purchase of $100 or more. (Christmas gifts, anyone??? That's 25% off!!)

CYBERFREE - Free domestic shipping on any order between $50 and $99.99. (See what she's done there?! Saved you a bundle on all of your smaller orders, ya?)

INTERNATIONAL10 - $10 off of shipping on any International order of $95 and Up. In my experience, that's almost half off of International shipping!!! Unless you can buy even more than I can, which I DARE you to try to do!! 

So what should you do??? Write these coupon codes down, and head on over to Calico Cat Fabrics, Now, to see what you just can't live without, and be ready to jump on that fabric bandwagon first thing Monday morning 11/30/15. Wooooooooo! 

We've finally had snow over here in Alaska. First real snow of the year and a hopeful start to a fabulous winter. At last!!! 

Wishing you and yours a Wonderful and Peaceful Thanksgiving!!!

XO!
Lori