Showing posts with label tutorial. Show all posts

Thursday, September 17, 2015

Dottie Angel Frock Tips and Tutorial links

You read it here, first, folks! I've actually made a garment!! 
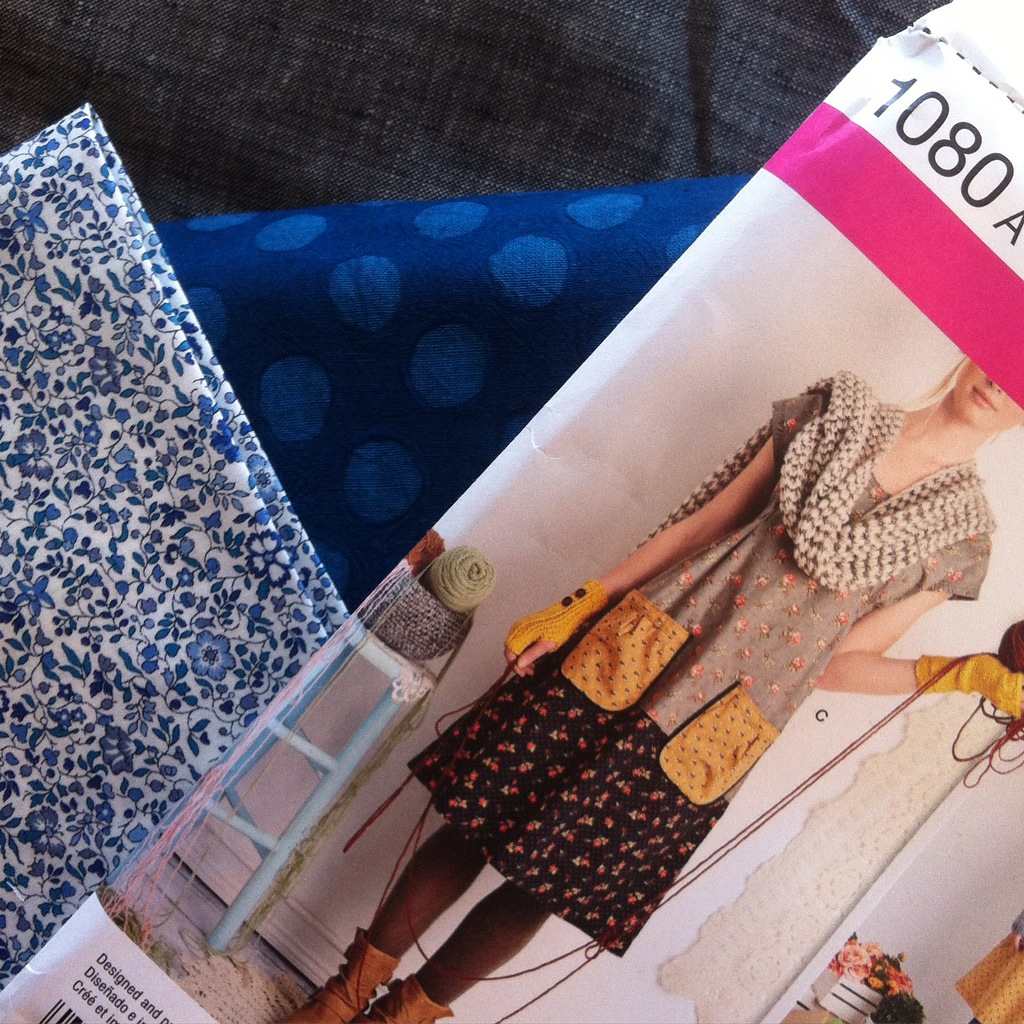
Meet the Dottie Angel Frock - Tunic Length!
I'll give you a short run down of what I did, as a newbie garment sewist and the World's Slowest Quilter, and link to other tutorials along the way. 
I hope you find this review useful! If there is anything more that I can do, like make three more to be sure of my tute, I'd be glad to help as much as I can;0

Materials:
Blue dot linen for body
Fat 8th of Liberty Tana Lawn for the pockets
Fat 8th of linen for pocket linings
I figured linen would give me the slouchy look I wanted, and quite honestly fit in with my ethic of Never Ever Again ironing clothing to wear. 

Let's start from the beginning:

Step 1: Measure yourself. Be honest here... no fudging on the waist/hips/bust. Now is not the time for solemnly swearing that you will stick to that diet and start going to the gym every day, so the garment will fit perfectly at some future imagined date. Measure honestly, with a flexible tape. Here are tutorials on how to do that. 


Step 2: Cut out your pattern. Now, if you're like me and have never sewn a garment, let alone one from this designer, you will be faced with a plethora of choices of sizes, and three styles, from which to choose. 


  • For the Dottie Angel Frock, I would suggest going up at least one bust measurement IF you are going to do as I did, and make longer darts. For instance, I cut the 38 1/2" bust size Small (8-10), although I'm a 36. It fits EXACTLY right, with no wiggle room, in the bust and under the arms, because of the two darts. I'm moderately cushioned under the arms, so you should choose based on your bust size, and on how much extra room you will need for movement. The back of the dress is very roomy, which does give you more leeway. 
  • Honestly, I still wasn't sure, so I cut out the pattern piece I thought would be right, and held it up to me very carefully, matching the finished shoulder seam with the seam on the shirt I was wearing, and pinching the pleats... This will give you a very rough estimate of fit, and definitely tell you if the size you have chosen is too small. This is a good beginner pattern in this way, because as an A-line dress/tunic, it is very forgiving as to body part coverage. 
  • You're supposed to use pattern weights, instead of pins, to secure the pattern pieces while you cut them out... But you know that the only kind of weights I've got in the house are Pie weights, and they roll all over. Sigh! So, if you do not have any weighting mechanisms, such as vintage ashtrays, the cat or clean and empty tea mugs, pin in this manner: Begin at the top, and smooth as you proceed to pin from left to right and left to right, down the pattern piece. Be sure there are no lumps!! Place the pattern pieces in accordance with the instructions.
  • CUT INSIDE THE LINE, when cutting your fabric/pattern piece. Why? Because that's the way professionals do it, and it will give all of your future garments better fit. Here's the person who says so:  Fashion Incubator A fascinating read into why you should cut accurately, and how to do so. 
Step 3: Mark your fabric
  • I have grey and white chalk, water soluble pens, and wax pencils, to use to mark objects in the Work Room... I chose to use a grey wax pencil because I couldn't find the 52000 white wax pencils I have somewhere, and because it would show well against the dark fabric and not wipe off or smear. 
  • Here is a great tutorial all about marking patterns. Who knew??!! Professor Pincushion I apologize for the annoying 3 second ad.
  • Mark the Tucks. Measure the length of the dotted line, and draw a line on your fabric, or pin to mark this length... I used pins, and increased my darts by 2" longer at the bottom, as I wanted a more fitted look. 
  • Mark the fabric at the dot as this is where you will center your tie, later.
  •  Mark the Pockets. 
  • Do you know the Pin Method of marking a pattern?? Put a straight pin through the pattern piece Dot mark, and mark the fabric with a pencil or other marking device, where the pin touches it, as it comes out of the back of the pattern piece. Brilliant!!
  •  Mark the Fold line and the beginning of the sleeve from the side (at the dot, see below)
(See below in Sew section for more about sewing the sleeves)
  •  Mark ALL of the tabs and the pocket placements!

Step 4: Begin to sew!
Follow the steps in the excellent instructions. 
I changed the pockets because I wanted to line them to help my Tana Lawn be more sturdy so I could put my phone in my pocket, and because I didn't feel like making the top band for the pocket. 

Sew the Pockets
  • Weight/pin and cut out the outer and lining pieces for two pockets, following the layout diagram in the instructions. 
  • Mark your fabric at the pleats.

  • Place pocket lining and outer fabric Right Sides Together (RST).
  • Pin at the pleats, and around the outer edges. Notice that my pleats are marked by pins of a different color. 
  • Beginning at Marked Pleat pin, sew around the outside circumference of the pocket with a 1/4" seam. End at the Second Pleat Pin. 


  • Clip the curves. Notice that you clip a little triangle out of the fabric. 

    • Clip the corners

    • Turn the pockets through the hole, between the pleat marks, right side out.
    • Smooth out the sides and poke out the corners, Press 
    • Fold pleats at line and pin in place.
    • Topstitch TOP of pocket. If skipping pocket placket like I did, backstitch at pleat to be sure it will stay in place, then continue sewing across top of pocket. I topstitched mine at 1/4" so that the topstitching would match the seam when I sewed the pocket to the tunic. Two lines of stitching, one at 1/8 and one at 1/4, would be pretty, here, as well :)
    • Pin pocket in place on tunic front, matching dots.
    • Try the tunic against yourself at this point. Check that you do, indeed, want pockets in this exact place. Notice that I have moved mine...
    • If you have extra stomachage that you wish to conceal, place the pockets closer together. If you're looking for the waif look, place them farther apart. 
    • Extra special FYI... if you, ahem, have delicious bosoms that happen to be different sizes than each other, this will effect how the final garment hangs on you, and will make your pockets fall in a different place than you think. For instance, if you're me, one of the pockets will fall dead center on the tunic front... and the other will be lost off to the side somewhere. Go ahead and wonder clip the tunic back and front together and gently wiggle into it. Pin the pockets where you think they can't possibly be a problem. Gently wiggle out, taking care not to stab yourself with the pins! Or just unclip the wonder clips, lol :)
    • OR, you can make a large apron style pocket across the front which would not only be super handy, but cute as heck!  
    Sew the Tie
    Sew as per the instructions. I used contrasting thread so that you can see what I'm talkin about. 

    Sew the  Front Darts


    •  I back stitched at the top and bottom of my darts, cause, honestly, they have a lot of work to do! 

    •  What I would CHANGE: I inserted the tie into the middle of the dart... because I forgot to check for the marking. From now on, I will insert it into the top of the dart, where the marking is, as that will give me an Empire waist look, and also work better to control the extra fabric from the back... See how mine has extra fabric under the arm? I may add elastic across the back of the tunic to make up for my bone-headedness. Try on your garment and mark where you would like YOUR tie to go. If you look at the pic on the pattern package, the tie is high up in the dart. Your final product will come out looking exactly like the pattern, if you follow the instructions. Nice!! 

    Sew the Shoulders


    •  Top-stitch on either side of the seam
    •  I pinked my seam allowances with shears. I hear there are rotary cutter pinking blades. That would work wonderfully on this pattern!
    Sew the Neck

    (Hint: Tuck the ties into a pocket to keep them out of the way :) Otherwise, I guarantee you, you'll sew them into a seam!)
    • Following @Happyzombie's tutorial over on Instagram, I chose not to bias tape my neck edges. Cause I'm lazy. Or a rebel. 
    • If you sew the neck in this way, it will make for a LARGER SCOOP... Just letting you know, as it increases the way the sleeve hangs from the shoulder... 
    • Clip the neck edge slightly less than 1/4", ALL of the way around the neck, shoulder, neck. 

  • Fold over 1/4", towards the INSIDE of the garment, press, using steam if you like
    • Fold over again, and press, holding in place with wonder clips (pins'll stab you as you go around sewing the neck)
    • Sew neck down, topstitching along edge farthest from the neck hole. 
    Sew the Sleeve tops

    • Try Frock on, marking where you want the sleeves to meet the sides.
    • Fold fabric over 3/8", between your marks, or the original marks from the pattern. Clip every inch or so along curve. Press.
    • Sew a 3/8" seam, then topstitch. I've used contrasting thread so that you can see, here.
    • Pink the seams so they don't ravel. Oops!
    Sew the Side Seams
    • Pin at marks. 
    • Sew beginning at underarm mark.
    • I didn't french seam my seams. I just pinked them... lazy lazy lazy. Or efficient, as I didn't have to worry about how to get the underarm seam to look decent this way ;0
    Sew the Hem
    • Fold the hem up 1/2", press.
    • Fold up 1/2" again, press 
    • With the garment inside-out, Top-stitch 1/8" from top of fold. I started and ended at a side seam so that I could back stitch without it being obvious. Make sure that you want your hem to be 1", if not, adjust the size of your seam, accordingly.
    I think I hemmed mine at 2", which is too short to wear with leggings... at least for me!


     I can't wait to make the dress length! I think it will flow more nicely, and be super comfortable in linens. 


    For more info on the Dottie Angel Frock, follow Dottie Angel on Facebook, and check out:

    Happy Zombie - I adore this girl!

    The House on Hill Road - Instructions on how she made her Frock. She did all of the stuff you're supposed to do a la the pattern. Her frock is stunners!

    Christine Haynes - Cutie!!

    Pleasant View School House - Two fabulous versions

    I am making at least two more Dottie Angel Frocks, in the dress length. They are addicting!! Please do let me know if you make one, I'd LOVE to see it!

    XX!
    Lori


    Linking up with Crazy Mom Quilts for Finish It Up Friday. Woo!!


    Thursday, April 30, 2015

    Sewtogether Bag Tips, Tricks and Links


    The Sewtogether Bag is a project bag designed by SewDemented. It has three interior pockets, and space for a needle keep and a pin cushion, if you'd like. I made mine to use for crochet or knitting, so I did not add the rest or pin cushion. My finished bag is 9 3/4" long and ~4 1/2" tall. Excellent for so many uses! Have an artist in your house, hook them up with one of these to keep their drawing supplies organized! Have that special Aunt who has everything? I bet she doesn't have one of these made by your loving hands to hold her sewing or crafting supplies! 
    I have to tell you, this was my first experience, EVER, putting in zippers... this bag had four zippers, and, honestly, they were what was keeping me from jumping in and making one, despite the fact that I regularly searched the hashtag #sewtogetherbag on Instagram and drooled over examples made the world over.

    But no more!! 


    To review the pattern:
    Things I liked,
    • You can make it with scraps, or F8ths. No need for yardage.
    • It becomes addicting to pull fabrics for future bags, it is so much fun to make!
    • You can tailor the outside and inside to look anyway you like. Like solids? Use solids! Like large florals? Flower away!! Like a mix? Mix it up!! 
    • The making of the bag is in small steps that are easily accomplished, but which look incredibly polished. 
    • It really is EASY.  Even the zippers!! And I love how Sewdemented thinks! The way this is put together is really eye opening when it comes to designing purses. Her method makes it so easy to make pockets. 


    Things I didn't like,
    • There are almost no pictures of the steps. I used Quilt Barn's excellent tutorial, as my main source of info on how to sew this pattern. Really, just go and read it through and keep it open as you go. You'll just zip right through. 
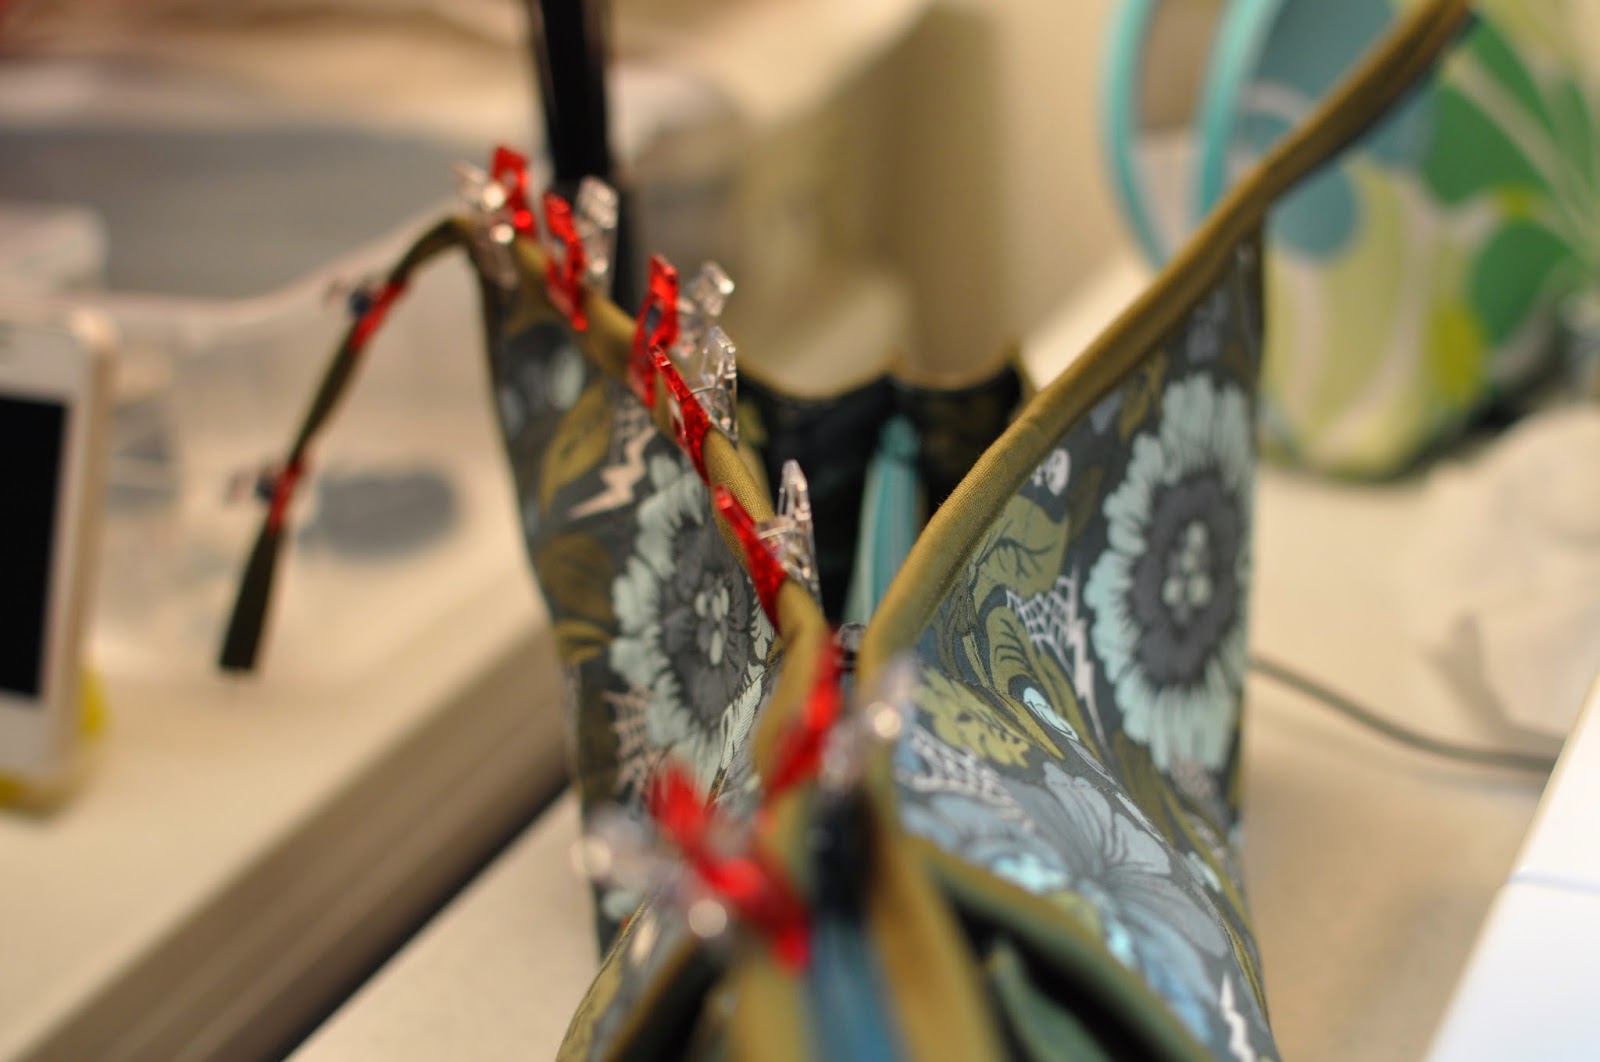
    • You really do need to have a machine that can go through a LOT of layers for the final binding. Luckily, I have one. Otherwise, hand sew the binding on, and hand attach the handles. It's still easy, just wanted you to know :)
    Tips and Tricks:
    • Use a Jeans or 100 needle so that you don't have skipped stitches. I now use them for every bag I make. 
    • Follow the order of operations from the Quilt Barn tutorial.
    • Use Wonder Clips to hold your layers together, that way you won't end up with alot of bent pins,


    • Use a thin interfacing. I used a thicker one for my outer layer, and that exacerbated the problem of having too many layers to easily and neatly sew through at the end,
    • Take your time and take pains with your topstitching. It'll really pay off! 
    • Have fun choosing your fabrics and zippers! The zipper choice really shows.


    • Use Quilt Barn's technique of filling bobbins with your threads, and sewing from them in the bobbin and as your top thread. Did you know you can do that??! I never thought of it! Having a bobbin on my top post that matched one side I was sewing, and one in the bobbin that matched the other side, gave my stitching real polish, as every stitch matched the fabric it went to.  Then, when I flipped the bag over to stitch the other side, I just switched bobbins. What will they think of next??! I'll be doing this on all of my small projects!! 
    • I will use a 20" or 22" zipper for my top zipper from now on... it will allow my Sewtogether Bag to lie more open while I am using it. My quilting ladies point out that if I do this, my stuff may fall out... Whether or not you do this depends on your intended use... and besides, who doesn't want to see my stuff all fallen out ;0
    •  Make a test bag, and then make 3 or 4 at the same time, after that. 
    • Remember to assemble the pockets/insides in the manner suggested. If you chain piece each pocket separately, you'll have to assemble the inside unit upside down and backwards brain bendingly blah blah blah... ask me how I know!!! Stick with the sequence Quilt Barn shows you, quick, easy, polished!
    • Be prepared. Cut all of your pieces, fuse your interfacings, and have your bobbins wound, in advance. Then you can just sit down and go!
    • DO NOT show this finished bag to your friends. Don't say I didn't warn ya!! You'll be making hundreds and hundreds of them in no time. 


    Materials:
    Outer Bag - Tula Pink Darkside
    Inside pockets - Tula Pink 10" squares
    Outside pockets - Kona solids; Aqua, Olive, Moss
    Binding - Kona Moss
    Zippers - 3, 9" polyester, 1, 18" polyester all from Joanns. They were ironable, which helped when topstitching the pockets.
    Thread - Gutermann polyester in Celery, Moss, Dusty Blue, and Dark Teal. I had no problems with thread breakage. 

    You can find the pattern on Craftsy, here


    I can't wait to see yours!!!
    XX!
    Lori

    Linking up with Fresh Sewing Day at Lily'sQuilts 


    and 
    Finish it up Friday at Crazy Mom Quilts

    and
    Let's Bee Social at Sew Fresh  Quilts

    And
    Fabric Tuesday over at Quilt Story


    Thursday, March 12, 2015

    I'm Cuckoo For You Beginner Tutorial

    Welcome to the tutorial for I'm Cuckoo For You! My sewing machine cover featured in Fat Quarterly Issue 20: Paper Piecing. Woo!

     Front Door View

    Back of House View

    Side of House View

    This tutorial accompanies the pattern, which can be purchased as part of Issue 20. This tutorial adds photos and recommendations for beginner paper piecers. I hope that you will take your time with, and enjoy, the process of paper piecing this sewing machine cover!! 

    I often see online comments from beginners, stating that they are afraid to paper piece. So I designed this pattern to gently lead the confident beginner through intermediate paper piecing. If your sewing machine is larger or smaller than the dimensions of the pattern, you can easily adjust the pattern by adding onto the SKY portions of the pattern (to make it bigger), or by increasing or decreasing the blank portions of the walls that I left for you to decorate. You can also make any of the sides of the house into mug rugs and placemats! Or you can make a house box by making the roof into a floor. Make a Community of houses to store your stash in! Woohoo!

    Fabric:
    See Pattern. I was given a fat quarter bundle of the delightful Dashwood Studios line, Cuckoos Calling. Just look at all of those cuckoo clocks!! This sewing machine cover was made using the entire line, plus coordinating solids. You could change it up anyway you like :)

    Cutting:
    Cut as you go. Cut all fabric pieces AT LEAST 1/2" larger than necessary to COVER seam allowances.  This way you will enjoy the process, and will always have success when placing your fabrics.

    Embellishment:
    Have a BLAST!! Woo! I added some fussy cut Cats, some funky flowers, and a heart shaped button for the doorknob. 
    You could add whimsical cuties anywhere you like, Fill the yard with flowers, and the sky with Sunshine!
    Hey! How about making it a red firehouse with black and white Dalmation dogs?! Fun!!

    What you will need
    Fabric:
    I used Cuckoos Calling by Dashwood Studios
    1/2 Yard main fabric for House, if directional. Slightly more than a Fat Quarter if using a solid
    Fat Quarter for Top and Roofs, combined
    Fat 1/8th fabric for Sky
    Fat 1/8th for Door and Window Sills
    Fat 1/8th for Garden if using a solid, more if using a directional print
    Fabrics to fussy cut for Window and Garden inserts
    Scraps for Walkway, Buntings, Curtains, Chimney and Sun
    Ric Rac for Trim
    Button for door knob
    1/2 yard One-sided fusible stabilizer or batting
    Hemming tape for finishing

    Materials:
    Fabric glue stick
    Add a Quarter ruler, or long quilting ruler with 1/4” measurement
    Recycled copy paper or paper piecing paper
    A piece of cardstock or a sturdy post card
    Scissors for cutting paper
    Rotary cutter

    Things to Remember
     Remember to read the pattern in full before starting
     Seam allowances are 1/4” unless stated otherwise
     Always press your fabrics before starting
     Press all seams as you go along

    Finished Size: 8 1/2” Wide x 16 1/2 “ Long x 12 1/2" Tall

    Beginners:
    Begin by piecing the Side Sections of the House. Pay special attention to the “Tips”.
    You will learn:
     - Piecing in a series, A-B-C
     - Fussy cutting
     - Gentle Angles – Roof
     - Acute Angles – Bunting, window curtains

      <<Tip>> Clip all threads as you go. This will keep your final project from looking like a hedge hog, lol!

    Intermediates:
    Review instructions for assembling Sides of the House. Begin sewing with whichever side you like. You will make two house sides, a front and a back. Kick it up a notch and frame your fussy cuts, put curtains in all of the windows, or add fussy cuts to the garden or sky. How about making special house for a Cat Lady?! Have fun!!

    Step One:
    Prepare pattern pieces:
    Print on recycled or paper piecing paper in Landscape mode. Be sure your printer is NOT set to ‘scale to fit’.
    Color in or label each section of the pattern so that you can tell the sections apart as you are paper piecing.
    Cut out ONLY the pattern pieces you are currently using. This will help you to stay organized and not accidentally mix up pattern pieces. Lay them out so that they represent the finished part of the house. Keep them in this format for reference. Don’t forget that the pattern is the reverse of the finished product!
    Color in and Label the parts!

    -Cut out and tape together Roof and Garden sections of house sides, AFTER you have assembled the Center section of each of the sides of the house, in case your seams are greater or lesser than 1/4”.

    Step Two:
    Prepare Materials:
    - Lower your ironing board, and place it adjacent to your work space. Heat your iron.
    - Cut pieces of fabric AS YOU GO. Please follow the cutting guidelines for each section. Doing so will make placement of the pieces easier, and ensure overlap of fabric into seam allowances.

    <<Tip>> If you use solid fabrics, except for fussy cuts, it will be easier to cut for this project, and use less fabric. 

    Step Three:
    Piece House Side
    Section B, House Side:
    B1 – Fussy Cut Window, cut 5” Wide x 5” Tall
    <<Tip>> Cut a piece of freezer paper to this dimension. Use it to choose your fussy cut, then lightly iron in place, then cut 
    B2 - House, 4” Wide x 2” Tall
    B3 – Window Sill, 4”Wide x 1 1/2” Tall (cut a strip 1 1/2" Tall by 15” Wide and cut into sections for all window sills on this side)
    B4 – House, 4” Wide by 4 1/4” Tall
    B5 – House, 1 1/2” Wide x 9” Tall
    B6 – Sky, 1 1/2” Wide x 9” Tall
    B7 – House, 2” Wide x 9” Tall

    Assemble Section B:
    -Choose a fabric to fussy cut for your window (B1). Cut. Dot a dab of glue onto the back of the B1 Section of your pattern. Place the fussy cut fabric, wrong side towards the glue. Holding the pattern and fabric up to a strong light, arrange the fussy cut so that it is centered in the window, and overlaps all seam allowances. Press fabric to glue to adhere in place.
    <<Tip>> Practice. Slide the fussy cut up and down and around! Are all of the seam allowances adjacent to that piece, covered? If not, adjust until they are, or cut a larger piece of fabric 
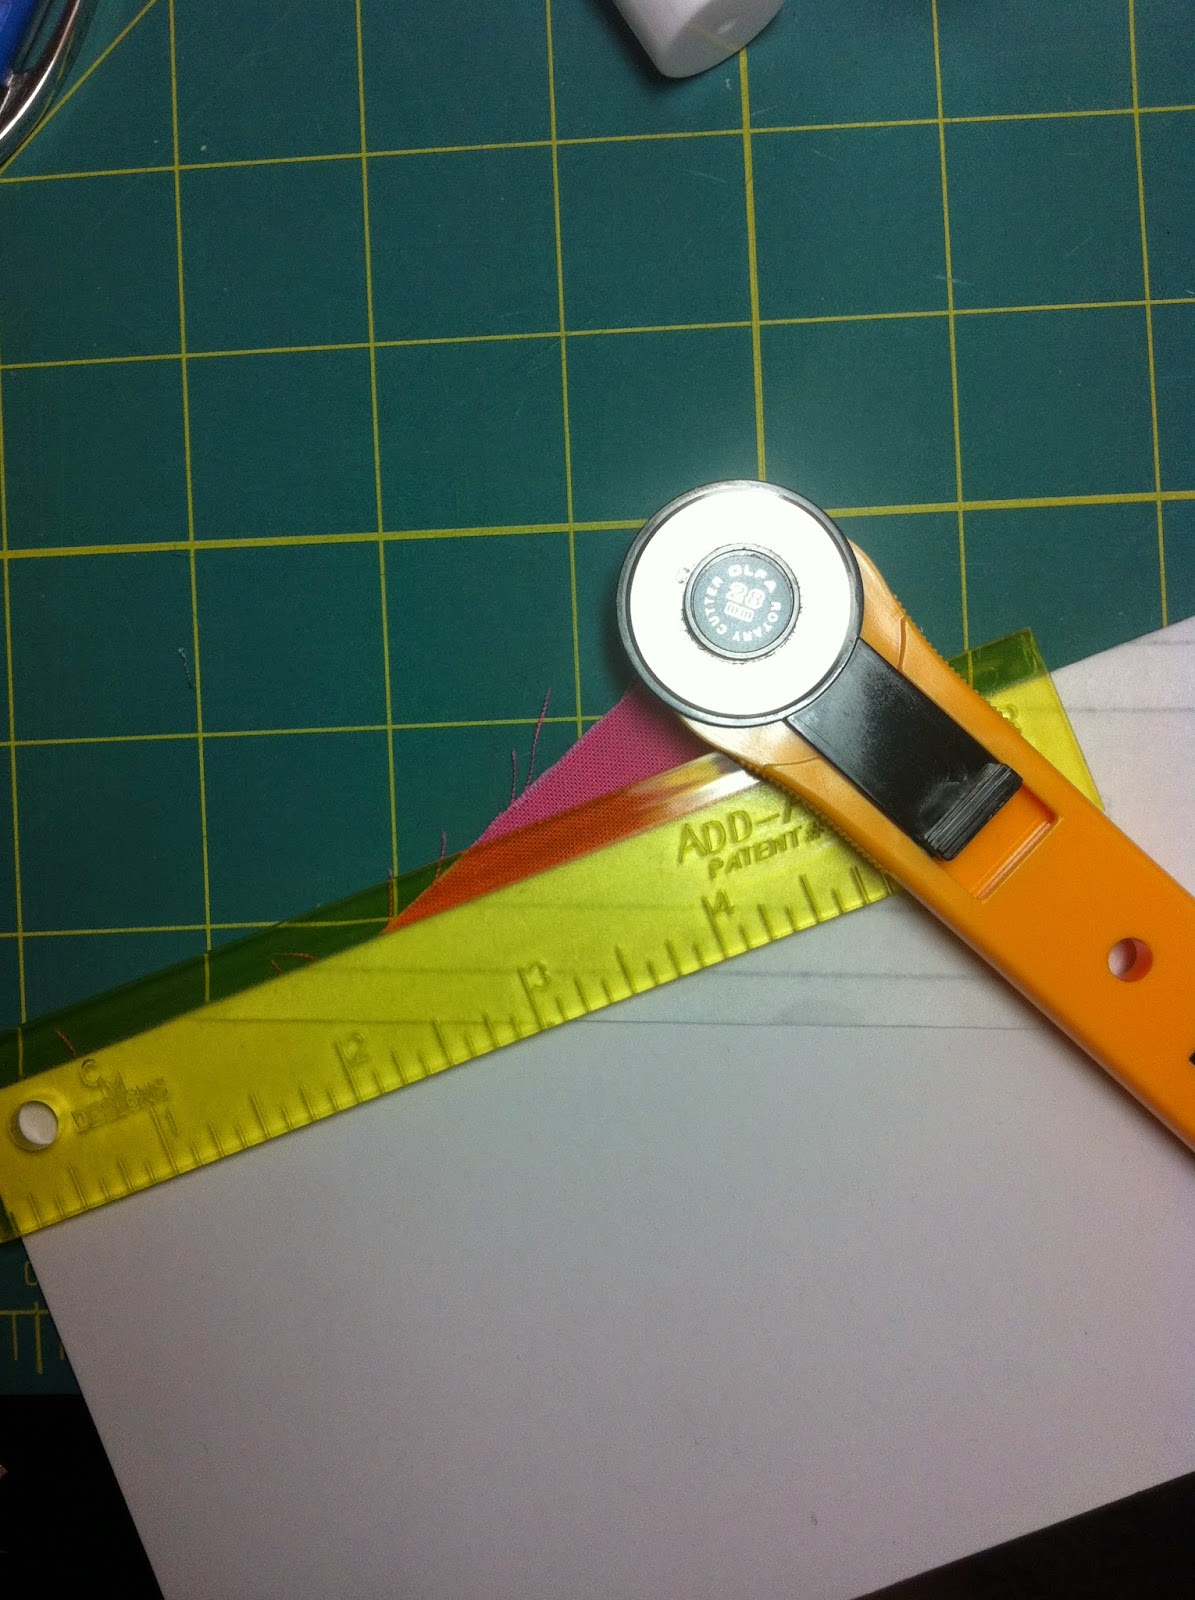
    -  Place on a cutting mat, fold the paper piece pattern towards you along the line between B1 and B2 so you can see the fabric underneath, and then crease using the card stock as an edge.

     - Using the Add a Quarter ruler, trim fabric 1/4” from the paper fold.

      - Unfold paper pattern and flatten. Align edge of B2 with edge of B1, RIGHT SIDES TOGETHER. Practice by flipping B2 up into its finished positon. Does it cover all seam allowances? Is it upside right?
      - Return B2 so that it is right sides together with B1. Smooth edges of fabric so that they adhere to each other. Sew along the B1/B2 line, making sure stitch length is set to 1.8.

    <<Tip>> Slide from the Side! Insert your fabric under the presser foot by sliding from the side, rather than sliding over the feed dogs. This will keep your top and bottom fabrics from slipping apart or folding back. 

      -  Flip B2 fabric into place and gently press. Be careful not to slide the iron as this may warp your piece. Celebrate!! You’ve done the hardest part!!

      -  Using card stock, fold paper pattern along line B1/B3, trim. Unfold paper pattern and flatten. Align piece B3 right sides together with the edge of B1, smooth together, and Sew.

    - Flip B3 into finished position, press.

     -  Using card stock, fold paper pattern along line B3/B4, trim. Unfold paper pattern and flatten. Align piece B4 right sides together with the edge of B3, smooth together, and Sew.
    -Flip B4 into finished position and gently press. You may wish to add a dot of glue to hold it in place

      -  Using card stock, fold paper pattern along line B1234/B5, trim. Unfold paper pattern and flatten. Align piece B5 right sides together with the edge of B1234, smooth together, and Sew.
      - Flip B5 into finished position and gently press.
    - - Using card stock, fold paper pattern along line B5/B6, trim. Unfold paper pattern and flatten. Align piece B6 right sides together with the edge of B5, smooth together, and Sew.
      - Flip B6 into finished position and gently press.
      - Using card stock, fold paper pattern along line B1234/B7, trim. Unfold paper pattern and flatten. Align piece B7 right sides together with the edge of B1234, smooth together, and Sew.
       - Flip B7 into finished position and gently press.  -  You have completed the first section of your house side! It should look like this:
    -  Trim completed section, trimming slightly outside of the seam allowance lines.

    Section C:
    C1 – Window, Fussy Cut 6 1/4”Wide x 5 1/2” Tall
    C2 – House, 6 1/4" Wide x 1” Tall
    C3 – Window Sill, 6 1/4" Wide x 1 1/2" Tall, use strip from section B
    C4 – House, 6 1/4" Wide x 4” Tall

    <<tip>> Cut a strip 6 1/4" x 5”, cut 1” across width for C2, use the remainder for C4

    Assemble in the same manner as Section B.

    Section D:
    D1 - Fussy Cut Window, 5” Tall x 5” Wide
    D2 – House, 1 1/4” Tall x 4” Wide
    D3 – Window Sill, 1 1/2" tall x 4” Wide, use strip cut in Section B
    D4 – House, 3 1/2" Tall x 4” Wide
    D5 – House, 9” Tall x 1 1/4" Wide
    D6 – House, 9” Tall x 1 1/4"Wide
    D7 – Sky, 9” Tall x 1 1/4" Wide

    <<tip>> Cut house fabric strip 9” Tall by 2 1 /2” Wide, and subcut into D5 and D6. If using a print, be careful of the direction!
    Assemble in the same manner as Section B.

    Assemble BCD Section of house
    -  Right sides together, Sew section C to section D
    - Check to see that you like your results. Trim seams. Press
    - Sew Unit CD to section B
    - Trim around outside of BCD unit, slightly outside of the seam allowance line. Press. Do not remove papers.
    <<Tip>> Beginners: Do not trim outside seams (sky and garden) until ready to assemble the entire project. You will have plenty of seam allowance to work with in assembly. Then trim the seams after sewing. 

    - Add Ric Rac to top of BCD Section. Insert Ric Rac into seam between B5 and B6 sections, and sections B1234 and B7, by unpicking seam 1/4". Pin in place. Sew in place using a seam less than 1/4". Press.

       
     Do not remove papers. The papers will help keep your sections from stretching or wrinkling as you work.

    Section E:
    Measure your actual assembled house BCD section. Tape E sections together to equal this amount as illustrated below.


    Cut: 
    E1 - Roof, 3” Tall x length of your BCD section
    E2 & E3 - Sky, 4” Tall x 4” Wide. This may seem like a large piece of fabric, but if using directional prints, it will allow you to align them as you like, and still cover seam allowances once flipped into place.
    <<tip>> Cut a strip 4” Tall by 8” Wide. Then subcut into two equal E2 and E3 pieces

    Assemble Section E, Roof: 
    - Sew E1/E2 intersection
    Sew E2/E3 intersection
    Press. Trim around the outside of the completed section, slightly outside of seam allowance line
    Sew Section E, Roof to Section ABCD, House. Press.

    Section A, Garden:
    Measure your actual assembled house BCD section. Tape A sections together to equal this amount as illustrated above.
    Section A:
    A4 – Garden, 2 1/2" Tall x your length plus 1/2" extra
    A1 – Fussy Cut, 2 1/2" Wide x 2 1/2" Tall
    A2 – Garden, 1” Wide x 2 1/2" Tall
    A3 – Garden, 2” Wide x 2 1/2" Tall

    Assemble Section A:
    - Sew A1/A2 border.
        - Sew A1-2 to A3
        - Sew A123 to A4
        - Press. Trim to same length as section BCD.

        - Sew to Section BCD. Press.
        - Remove papers, GENTLY. Try not to stretch the sections. Woohoo!! Looking Good!
        - Make second House side. Enjoy the process!

    Step 4:
    Piece Front Entrance of House:
    Section A, Front of House:
    A1 – Walkway, 5” Wide x 3 1/2" Tall
    A2 – Garden, 5” Wide x 4” Tall
    A3 – Garden, 3” Wide x 4” Tall

    Assemble Section A, Front of House:
    Sew A1 to A2, Press.
    Sew A 1-2 to A3, Press.
    - Trim around perimeter, trimming slightly outside of seam lines.


    Section B, Front of House:
    B1 – Fussy Cut Window, 4 1/2” Wide x 4 1/2" Tall
    B2 – House, 4” Wide x 1 1/2" Tall
    B3 – Window Sill, 4” Wide x 1” Tall
    B4 – House, 4” Wide x 4” Tall
    B5 – House, 1 1/4" Wide x 9” Tall
    B6 – Sky, 1” Wide x 9” Tall
    B7 – House, 1 1/2" Wide x 9” Tall
     <<tip>> B5 and B7 can be cut from a single 2 3/4” Wide x 9” Tall piece, then subcut into B5 and B7 

    Assemble Section B, Front of House:
    - SEW B1 to B2, Press, Trim.
    SEW B1-2 to B3, Press, Trim.
    - SEW B123 to B4, Press, Trim.
    SEW B1234 to B5, Press, Trim.
    SEW B12345 to B6, Press, Trim.
    - SEW B123456 to B7, Press.
    Trim around perimeter, trimming slightly outside of seam lines.

    Section C, Front Door of House:
    C1 – Fussy Cut Door Window, 2 1/2" Wide x 2 1/2” Tall
    C2 & C3 – Window Curtains, 3” Wide x 3” Tall, Cut 2
    C4 & C5 – Door Frame, 1” Wide x 2 1/2" Tall, Cut 2
    C6 – Front Door, 3 1/2" Wide x 1” Tall
    C7 – House, 3 1/2" Wide x 2” Tall
    C8 – Front Door, 3 1/2" Wide x 4 1/2" Tall
    C9 – House, 1 1/4" Wide x 8” Tall
    C10 – Sky, 1” Wide x 8” Tall
    Assemble as for Section A.

    Section D, Roof, Front of House:
    D1 – 9 1/2" Wide x 3” Tall
    D2 & D3 – Sky, 3 1/2" Wide x 3 1/2" Tall
    Assemble as for Section A.

    Section E, Sun and Sky, Front of House:
    E1 – Sky, Scrap
    E2 – Sun, 1 1/2" Wide x 1/1/2” Tall
    E3 – Sky, Scrap
    E4 – Sky, 3 1/2" Wide x 1 1/2" Tall
    Assemble as for Section A.

    Section F, Chimney, Front of House:
    F1 – Chimney, 1 1/2" Wide x 1 1/2" Tall
    F2 – Sky, Scrap
    F3 – Sky, 3 1/2" Wide x 1 1/2" Tall
    Assemble as for Section A.

    Assemble Front of House:
    Sew Section E to Section F at E4 and F1-2. Press.
    Sew EF Unit to Section D. Press.
    Sew Section B to Section C. Press.
    Sew Ric Rac to BC, following directions from House Sides. Press. Trim Ric Rac back so that it doesn’t intrude into seam allowances at outside edges of BC.
    Sew DEF to BC. Press.
    - Sew A to BCDEF, matching pathway to doorway. Press. Trim around perimeter, trimming slightly outside of seam lines.
       -  Remove papers


    Step 5:
    Piece Bunting Back of House:

    <<Tip>>Beginners: Assemble Section A, then H, then Buntings

    Cut Buntings:
    Color or label pattern pieces prior to cutting them out, and prior to assembly.
    Buntings are symmetrical, so cut 2 for C/F sections, 2 for B/G sections, and 2 for D/E sections.
    C1, F1 – Bunting Flag, 1 1/2" Wide x 3 1/2" Tall
    C2, F2 – House, 1 1/2" Wide x 2 1/2" Tall
    C3, F3 – House, 3/4" Wide x 3 1/2" Tall
    C4, F4 – House, 4” wide x 4” Tall
    C5, F5 – House, 11/2” Wide x 2 1/2" Tall
    C6, F6 – House, 1” Wide x 8” Tall

    B1, G1 – Bunting Flag, 1 1/2" Wide x 4 1/2" Tall
    B2, G2 – House, 1 1/4" Wide x 2 1/2" Tall
    B3, G3 – House, 1” Wide x 4 1/2" Tall
    B4, G4 – House, 1 1/2" Wide x 3” Tall
    B5, G5 – House, 1 1/2" Wide x 4” Tall
    B6, G6 – House, 1” Wide x 8” Tall
    B7, G7 – Sky, 1” Wide x 8” Tall

    D1, E1 – Bunting Flag, 1 1/2" Wide x 3” Tall
    D2, E2 & D3, E3 – House, 1 1/4" Wide x 3” Tall
    D4, E4 – House, 1 1/2" Wide x 4” Tall
    D5, E5 – House, 1 1/2" Wide x 2’ Tall
    D6, E6 – House, 1” Wide x 8” Tall

    Assemble Buntings:
    << Tip>> If you are using a directional print: As you sew the buntings, be aware that the point of the bunting is always facing down, and section B4 is always at the TOP. Arrange your fabric so that when it is flipped and pressed, it is upright. 

    - Dot a dab of glue onto the back of B1.
    - Using a strong light, arrange B1 wrong side against glue, so that all sides overlap into the surrounding sections by at least 1/4". Press to hold B1 in place.

    - Fold back paper at B1/B2 intersection, crease over card stock.

    - Using an Add a Quarter ruler, trim overhang to 1/4".

        - Fold paper back into place, and arrange B2 with right sides together against edge of B1. Holding fabric in place, flip B2 overtop of section B2 to ensure that you have all seam allowances covered. Adjust as needed.


        - Flip B2 back to right sides together, and Sew B1/B2 seam.
        - Fold back paper at B2/B3 intersection, crease over card stock. 
        - Using an Add a Quarter ruler, trim overhang to 1/4".
        - Fold paper back into place, and arrange B3 with right sides together against edge of B1. Holding fabric in place, flip B3 overtop of section B3 to ensure that you have all seam allowances covered. Adjust as needed.
        -  Flip B3 back to right sides together, and Sew B1/B3 seam. 
        -  Fold pattern back at B123/B4 line. Crease, and using an Add a Quarter ruler, trim seam fabric to 1/4".
        - Fold pattern back into place, and arrange fabric B4 so that edges are even with B123 seam edge, right sides are together, and it covers all of section B4, when flipped into place.
    1   - Flip B4 back to right sides together, and Sew B123/B4 seam. Flip B4 fabric into place and press carefully.

    <<Tip>> Dot a dab of glue to hold longer pieces of fabric in place, so that they do not flop around and inadvertently get sewn into adjacent seams.

        - Fold pattern back at B1234 /B5 line. Crease paper, and using an Add a Quarter ruler, trim seam fabric to 1/4".
        - Arrange fabric B5 so that it is right sides together, even with B1234. Flip to ensure that it covers all seams by at least 1/4".
        - Flip back to right sides together, and Sew B1234/B5 seam.
    1  - Flip open and press. Dot with glue to hold in place as necessary.
        - Fold pattern back at B12345 /B6 line. Crease, trim seam fabric to 1/4" using an Add a Quarter ruler.
    1   - Fold pattern back into place, arrange B6 fabric right sides together, and long edge even with B12345 edge. Sew B12345/B6 seam. Flip B6 into place, and Press.


     Celebrate!!! You’ve completed your first paper pieced bunting!!

       - Continue to assemble remaining Bunting sections, C, D, E, F, and G, as per instructions, above. Press carefully. Trim all interior seams to 1/4”. Trim Sky seam sections to 1/2" if you wish to have a little extra wiggle room for assembly. Otherwise, trim to 1/4".

    Assemble Bunting Section:
    Sew B to C.
    SEW BC to D
    SEW BCD to E
    SEW BCDE to F
    Sew BCDEF to G
    Press all seams in one direction.
    Do not remove papers.

    Section A, Garden, Bunting:
    A1 – Fussy Cut Flowers, 2 1/2" Wide x 2 1/2" Tall
    A2 – Grass, 2” Wide x 2” Tall
    A3 – Grass, 5” Wide x 3” Tall
    A4 – Fussy Cut Flowers, 2 1/2" Wide x 3” Tall
    A5 – Grass, 1 1/2" Wide x 3” Tall

    Assemble Section A, Garden, Bunting:
    - Assemble as per House Side garden instructions. Press.
    - Trim to fit Unit BCDEFG.
    - Sew Section A to Unit BCDEFG. Press.

    Section H, Roof, Bunting:
    H1 – Roof, 9” Wide x 3” Tall
    H2 & H3 – Sky, 4” Wide x 4’ Tall (Cut 2)

    Assemble Section H Roof, Bunting:
    - Assemble as per House Side roof instructions. Press.
    - Trim to fit Unit ABCDEFG
    - Sew Bunting hanging line. I used Ric Rac. Use whatever strikes your fancy!

    <<Tip>> If using Ric Rac, cut slightly longer than needed and tuck under roofline Ric Rac. Do not cut Ric Rac exactly to size as it will fray.

    - Sew Ric Rac along top of UNIT ABCDEFG using a seam less than 1/4".
    - Trim Ric Rac back so that it does not infringe on seam allowance at outside edges of pattern.
    - Sew Section H to Unit ABCDEFG. Press. Trim around perimeter, trimming slightly outside of seam lines.
     Remove papers.


    Step 6:
    Stabilize Sewing Machine Cover Components:
    - Cut batting or stabilizer to 1/2” Less Wide and 1/2" Tall, than your House Side. I used one sided fusible stabilizer on my Sewing Machine Cover.
    - If using fusible stabilizer, fuse onto wrong side on House Side, following manufacturer’s instructions. If using batting, quilt as you like, being sure to sew around entire perimeter of batting with an 1/8” seam. Use thread to match your fabric. Press.
    - Continue to fuse or sew stabilizer/batting onto the wrong side of the remaining House Side, the House Front, and the House Bunting.

    Step 7:
    Assemble Sewing Machine Cover:
    - Sew House Front to a House Side, right sides together, being sure they are both oriented upright. Use a 1/4" seam. The remaining seam allowance will be taken up by the stabilizer when you turn your cover right side out.
    - Sew House Bunting to your House Front+Side Unit, right sides together, maintaining a 1/4" seam.
    - Sew Final House Side to your House Front+Side+Bunting Unit, right sides together, maintaining a 1/4" seam.
    - Sew ends together, right sides together, completing a rectangular unit.
    - Measure the length of your final sewn House Side. Add a 1/4". Measure the length of your final House Front, add 1/4". Cut a rectangle of this length and height to become the top of your sewing machine cover.

    <<tip>> Use the fabric you made the sky from, or another fun material! The top of your cover doesn’t have to match your House Roof. Have fun with it! 

    - Stabilize your sewing machine cover top in the same manner you did the rest of your units.
    - Sew the Top to the sewing machine cover, right sides together. It’s easier than it looks! Just start with a long side, place right sides together as usual, and sew along that side to 1/4" from the end, turn the corner, tug on the fabric of the top until it will smoothly align with the next side, and sew. Continue around the remaining sides. Back tack at the end of the final seam.
    - Turn the cover right sides out. Press.
    - Turn bottom edge of sewing machine cover under 1/4" into the interior of the cover. Edge stitch in place or fuse in place with hemming tape.
    - Sew button onto front door as a door knob. Add additional embellishments as you wish.

     Woot Woot!! I am so psyched you’ve learned so much about paper piecing and made such a great sewing machine cover!


    Please share pictures of your finished projects on Flikr: https://www.flickr.com/groups/2749277@N21/